OverviewVisão geral
Sales Configurator is an Unreal Engine 5 template for building interactive sales configurators. The reference case is a furnished apartment, but it fits any product that has spaces and options to pick from. O Sales Configurator é um template de Unreal Engine 5 para montar configuradores de venda interativos. O caso de referência é um apartamento decorado, mas ele serve para qualquer produto que tenha ambientes e opções a escolher.
The template has two sides. You build your catalog on the setup side, and your customer uses the runtime side. Both read the same data, so anything you configure in the tool shows up in the playable configurator. O template tem dois lados. Você monta o seu catálogo no lado de setup, e o seu cliente usa o lado de runtime. Os dois leem os mesmos dados, então tudo que você configura na ferramenta aparece no configurador jogável.
The setup sideO lado de setup
The setup side is the EUW_ConfiguratorSetup, an Editor Utility Widget that runs inside the Unreal editor. You use it to create projects, products, rooms (zones), option groups, the item catalog, and the per-room quantity multipliers, then validate everything before you publish. You never have to open a Blueprint: the tool does the work and saves to the right Data Assets and DataTable for you.
O lado de setup é o EUW_ConfiguratorSetup, um Editor Utility Widget que roda dentro do editor da Unreal. Você o usa para criar projetos, produtos, ambientes (zones), grupos de opção, o catálogo de itens e os multiplicadores de quantidade por ambiente, e depois valida tudo antes de publicar. Você nunca precisa abrir um Blueprint: a ferramenta faz o trabalho e salva nos Data Assets e na DataTable certos por você.
The runtime sideO lado de runtime
The runtime side is the playable configurator your end customer uses: splash, login, product selection, walking through the rooms of the scene, choosing items per group, a price calculated by area and quantity, and a summary and order screen at the end. It reads exactly the same Data Assets that the setup tool writes. O lado de runtime é o configurador jogável que o seu cliente final usa: splash, login, seleção de produto, navegação pelos ambientes da cena, escolha de itens por grupo, um preço calculado por área e quantidade, e uma tela de resumo e pedido no fim. Ele lê exatamente os mesmos Data Assets que a ferramenta de setup escreve.
The bridge between both sides is the data model. Understanding it is the prerequisite for everything else, so it comes right after this page. If you only read one section before opening the tool, read that one. A ponte entre os dois lados é o modelo de dados. Entendê-lo é o pré-requisito para todo o resto, então ele vem logo depois desta página. Se você for ler uma seção só antes de abrir a ferramenta, leia essa.
You can build everything with the setup tool — the recommended path, covered by the step-by-step. Or you can do it by hand in the Content Browser (editing the data assets and tables), covered under Doing it without the setup tool. They write the same data; most people use the tool and drop to the manual route only for the few fields it does not cover yet. Você pode montar tudo com a ferramenta de setup — o caminho recomendado, coberto pelo passo a passo. Ou fazer na mão no Content Browser (editando os data assets e as tabelas), coberto em Fazendo sem a ferramenta. Os dois escrevem os mesmos dados; a maioria usa a ferramenta e recorre ao caminho manual só para os poucos campos que ela ainda não cobre.
Requirements & pluginsRequisitos e plugins
The template targets Unreal Engine 5.6. If you create a project from it (the usual route), everything is already set up and the plugins are already on. You only need this page if you migrate the content into a project of your own. O template é para Unreal Engine 5.6. Se você cria um projeto a partir dele (o caminho comum), tudo já vem configurado e os plugins já vêm ligados. Você só precisa desta página se migrar o conteúdo para um projeto seu.
On the FAB library, this template has a Create Project button. Use it to make your project, then drop your own assets inside. You can skip the rest of this page, because the plugins and settings are already set up for you.Na biblioteca do FAB, este template tem um botão Create Project. Use-o para criar o seu projeto e depois coloque os seus assets dentro. Você pode pular o resto desta página, porque os plugins e as configurações já vêm prontos.
Required pluginPlugin obrigatório
One plugin is what the configurator itself depends on: Um plugin é do que o configurador em si depende:
| PluginPlugin | WhyPor quê |
|---|---|
| Variant Manager (VariantManager) | Provides the LevelVariantSets that drive the visual swaps. Without it, catalog items cannot change the scene.Fornece os LevelVariantSets que dirigem as trocas visuais. Sem ele, os itens do catálogo não conseguem mudar a cena. |
The setup tool also uses the editor scripting utilities, which are on by default in UE 5.6, so there is nothing extra to enable for it. A ferramenta de setup também usa os editor scripting utilities, ligados por padrão na UE 5.6, então não há nada extra para habilitar por causa dela.
Enabled in the sample (archviz tooling)Ligados no exemplo (ferramentas de archviz)
The sample project also ships these on, because it is built for architectural scenes. They are import and scene-authoring tools, not runtime requirements. Enable the ones that match how you bring in content; skip the rest. O projeto de exemplo também vem com estes ligados, porque é feito para cenas de arquitetura. São ferramentas de importação e de autoria de cena, não requisitos de runtime. Habilite os que combinam com o jeito que você traz conteúdo; ignore o resto.
| PluginPlugin | ForPara |
|---|---|
| Datasmith Importer, Datasmith CAD Importer, Datasmith C4D Importer, Interchange EditorDatasmith Importer, Datasmith CAD Importer, Datasmith C4D Importer, Interchange Editor | Importing scenes from CAD, Cinema 4D, and other DCC tools.Importar cenas de CAD, Cinema 4D e outras ferramentas DCC. |
| AxF Importer, Dataprep EditorAxF Importer, Dataprep Editor | Physical materials (AxF) and batch import cleanup.Materiais físicos (AxF) e limpeza de importação em lote. |
| Sun Position, HDRI BackdropSun Position, HDRI Backdrop | Sky and lighting helpers for a scene. The template itself works under any lighting.Ajudantes de céu e iluminação de uma cena. O template em si funciona sob qualquer iluminação. |
| Modeling Tools Editor ModeModeling Tools Editor Mode | In-editor mesh editing.Edição de mesh dentro do editor. |
| Movie Render Pipeline (+ mask pass), Python Editor Script PluginMovie Render Pipeline (+ passe de máscara), Python Editor Script Plugin | High-quality renders and editor scripting. Authoring conveniences, not needed to run the configurator.Renders de alta qualidade e scripting do editor. Conveniências de autoria, não necessárias para rodar o configurador. |
Data modelModelo de dados
Everything the configurator shows comes from a small set of Data Assets and one DataTable. The whole template is built around this hierarchy. Tudo que o configurador mostra vem de um pequeno conjunto de Data Assets e uma DataTable. O template inteiro é construído em torno desta hierarquia.
The hierarchyA hierarquia
A Project holds one or more Products. Each product has Zones (the rooms), and each zone has option Groups that reference Items from the product's item table. In the scene, a Zone Trigger per room carries the multipliers used for pricing. Um Project contém um ou mais Products. Cada produto tem Zones (os ambientes), e cada zona tem Groups de opção que referenciam Items da tabela de itens do produto. Na cena, um Zone Trigger por ambiente carrega os multiplicadores usados no preço.
ZoneRef → points to the BPDA_Zone it representsaponta para a BPDA_Zone que representaMultipliers → map GroupId → float (area / quantity)mapa GroupId → float (área / quantidade)
Assets use short prefixes: BPDA_ for a Data Asset (Project, Product, Zone, UITheme), BP_ for a Blueprint actor (the Zone Trigger), DT_ for a DataTable, S_ for a struct, and WBP_ for a widget. You will see these in the content browser and in the field names below.
Os assets usam prefixos curtos: BPDA_ para um Data Asset (Project, Product, Zone, UITheme), BP_ para um ator Blueprint (o Zone Trigger), DT_ para uma DataTable, S_ para uma struct, e WBP_ para um widget. Você vai ver esses prefixos no content browser e nos nomes de campo abaixo.
Project — the developmentProject — o empreendimento
The BPDA_Project is the top of the tree: your brand and the list of products you offer. It carries the splash and login art, the currency symbol, the UI theme, and the languages. The full field list is in the field reference.
O BPDA_Project é o topo da árvore: a sua marca e a lista de produtos que você oferece. Ele carrega a arte do splash e do login, o símbolo de moeda, o tema de UI e os idiomas. A lista completa de campos está na referência de campos.
Product — the product or floor planProduct — o produto ou planta
A BPDA_Product is one thing your customer can configure: an apartment plan, a car trim, a kitchen layout. It points to the level (scene) to open, the default camera, the list of zones, and the item table. A project can have several products; the runtime shows them as cards on the product screen.
Um BPDA_Product é uma coisa que o seu cliente pode configurar: uma planta de apartamento, uma versão de carro, um layout de cozinha. Ele aponta para o level (a cena) a abrir, a câmera padrão, a lista de zonas e a tabela de itens. Um projeto pode ter vários produtos; o runtime os mostra como cards na tela de produto.
Zone — the roomZone — o ambiente
A BPDA_Zone is one room or area of the product: kitchen, living room, master suite. It carries a display name and icon for the navigation rail and minimap, and it holds the option groups. Each zone has a stable ZoneId (PascalCase, no dots) that links it to its trigger in the scene.
Uma BPDA_Zone é um ambiente ou área do produto: cozinha, sala, suíte máster. Ela carrega um nome de exibição e um ícone para o rail de navegação e o minimapa, e guarda os grupos de opção. Cada zona tem um ZoneId estável (PascalCase, sem pontos) que a liga ao seu trigger na cena.
Root groups vs. dependent groupsRoot groups x dependent groups
A zone splits its groups in two. Root groups are always shown. Dependent groups only appear once a specific item unlocks them, through the group's DependsOn field. Use a dependent group when an option only makes sense after another choice, for example a "cabinet finish" group that shows up only after the customer adds cabinets.
Uma zona divide os grupos em dois. Os root groups são sempre exibidos. Os dependent groups só aparecem depois que um item específico os destrava, pelo campo DependsOn do grupo. Use um dependent group quando uma opção só faz sentido depois de outra escolha, por exemplo um grupo "acabamento do armário" que só surge depois que o cliente adiciona armários.
Group — the set of optionsGroup — o conjunto de opções
A group (the S_Group struct, stored inside the zone) is a set of interchangeable options the customer picks from, like "flooring" or "wall paint". Its GroupId is the key used in the trigger's multiplier map, and its ItemRows list holds the item codes that belong to the group. Items are referenced by code, never copied.
Um grupo (a struct S_Group, guardada dentro da zona) é um conjunto de opções intercambiáveis que o cliente escolhe, como "piso" ou "tinta de parede". O GroupId é a chave usada no mapa de multiplicadores do trigger, e a lista ItemRows guarda os códigos dos itens que pertencem ao grupo. Os itens são referenciados por código, nunca copiados.
Items table — the catalogTabela de itens — o catálogo
The item table (a DataTable, the product's ItemsTable) is the actual catalog. Each row is one item; the row name is the item's unique code, and groups reference items by that code. A row carries the display name, brand, measure, gross price, description, thumbnail, and an optional link to a visual variant. Full columns are in the field reference.
A tabela de itens (uma DataTable, o ItemsTable do produto) é o catálogo em si. Cada linha é um item; o nome da linha é o código único do item, e os grupos referenciam itens por esse código. Uma linha carrega o nome de exibição, a marca, a medida, o preço bruto, a descrição, o thumbnail e um link opcional para uma variante visual. As colunas completas estão na referência de campos.
Currency is not a column in the table. The symbol comes from the project's CurrencySymbol and is applied to every price by the UI. Switching the interface language changes only how the number is formatted, not the symbol.
Moeda não é uma coluna da tabela. O símbolo vem do CurrencySymbol do projeto e é aplicado a todo preço pela UI. Trocar o idioma da interface muda só a formatação do número, não o símbolo.
Zone Trigger — pricing in the sceneZone Trigger — o preço na cena
A BP_ZoneTrigger is a Blueprint actor placed in the level, one per zone. It points to the zone it represents (ZoneRef) and carries the multipliers: a map from group to a number that scales that group's items by area or quantity in that room. This is where the per-room quantity lives, so every zone needs a trigger in the scene.
Um BP_ZoneTrigger é um ator Blueprint colocado no level, um por zona. Ele aponta para a zona que representa (ZoneRef) e carrega os multiplicadores: um mapa de grupo para um número que escala os itens daquele grupo por área ou quantidade naquele ambiente. É aqui que mora a quantidade por ambiente, então toda zona precisa de um trigger na cena.
The pricing modelO modelo de preço
In one sentence: an item's price is multiplied by the multiplier of its group in that room, read from the zone trigger's Multipliers map.
Em uma frase: o preço de um item é multiplicado pelo multiplicador do grupo dele naquele ambiente, lido do mapa Multipliers do trigger da zona.
So a flooring item priced per square meter is multiplied by the room's floor area, and a light fixture priced per unit is multiplied by how many that room needs. The multiplier is what turns a unit price into a room total. Então um item de piso com preço por metro quadrado é multiplicado pela área do ambiente, e uma luminária com preço por unidade é multiplicada por quantas aquele ambiente precisa. O multiplicador é o que transforma um preço unitário em um total por ambiente.
A root group with no multiplier prices its items at zero. If items show up free in the runtime, the group is missing a multiplier in that zone's trigger, or the zone has no trigger at all. The Validation page catches both. Um root group sem multiplicador precifica os itens dele a zero. Se os itens aparecem de graça no runtime, falta um multiplicador para o grupo no trigger daquela zona, ou a zona não tem trigger nenhum. A página Validation pega os dois casos.
The Setup ToolA ferramenta de setup
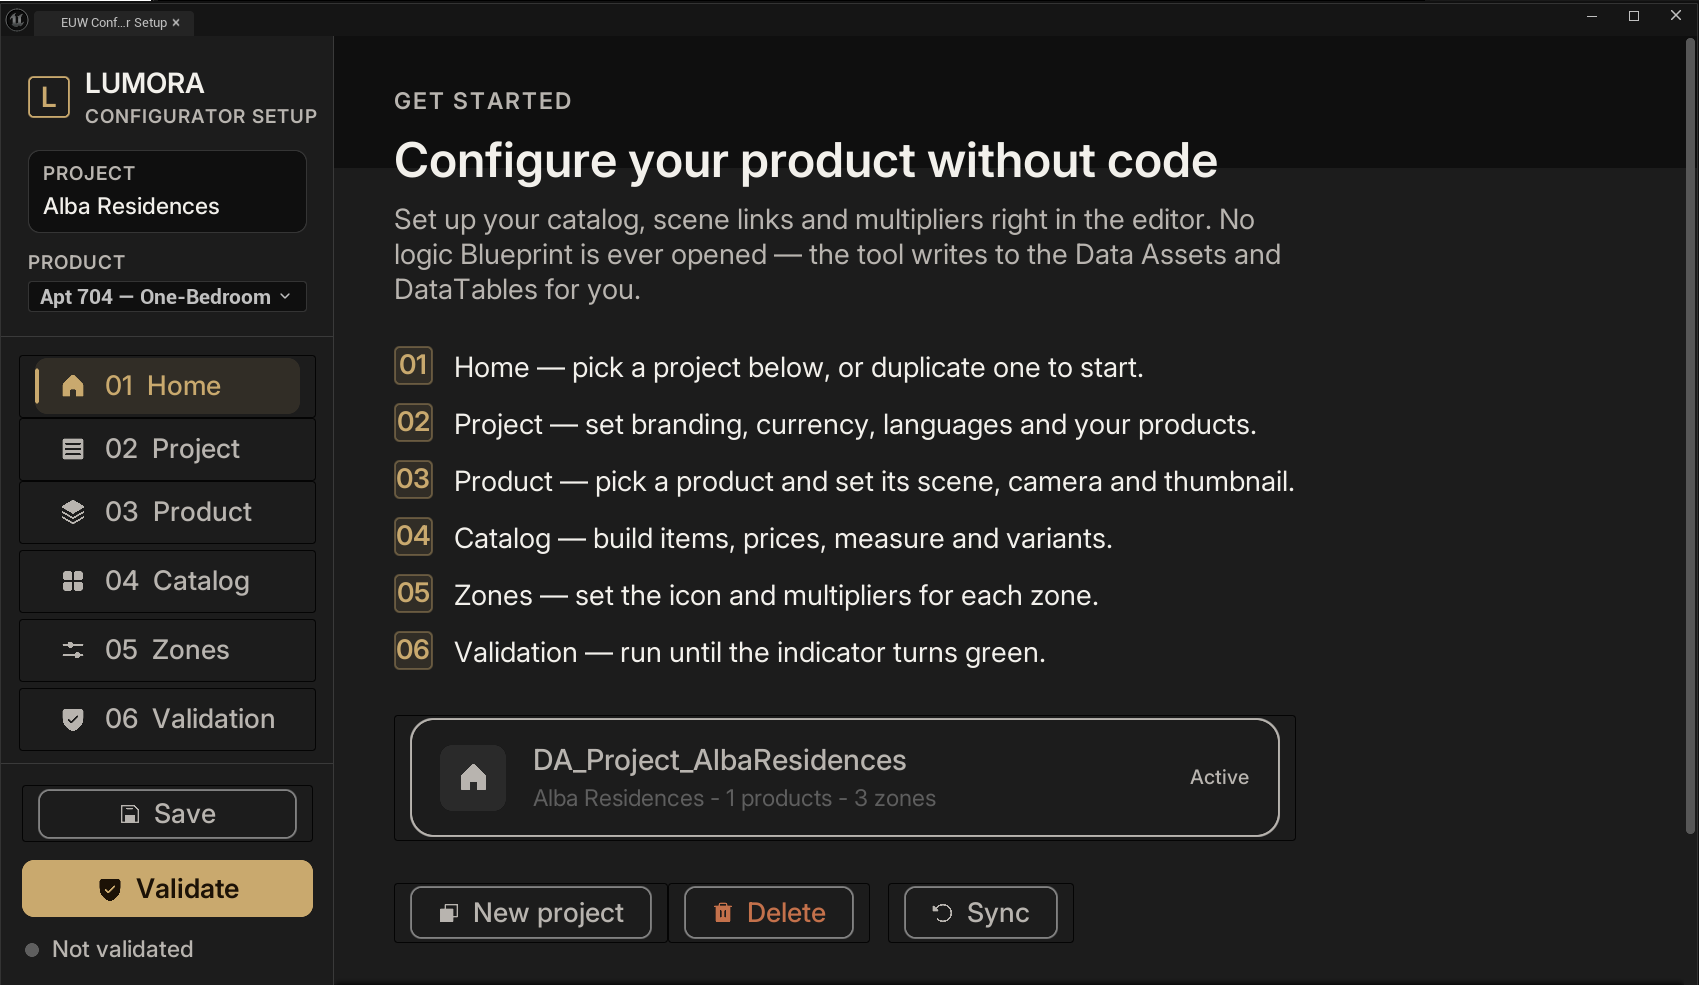
The EUW_ConfiguratorSetup is where you build your catalog. It runs inside the editor, and its interface is in English. This section walks through it page by page.
O EUW_ConfiguratorSetup é onde você monta o seu catálogo. Ele roda dentro do editor, e a interface dele é em inglês. Esta seção passa por ela página a página.
Opening the toolAbrir a ferramenta
In the Content Browser, find EUW_ConfiguratorSetup, right-click it, and choose Run Editor Utility Widget. The tool opens as a tab you can dock like any other editor panel. It is not the game: it edits your data assets directly.
No Content Browser, encontre o EUW_ConfiguratorSetup, clique com o botão direito e escolha Run Editor Utility Widget. A ferramenta abre como uma aba que você pode encaixar como qualquer outro painel do editor. Ela não é o jogo: edita os seus data assets diretamente.
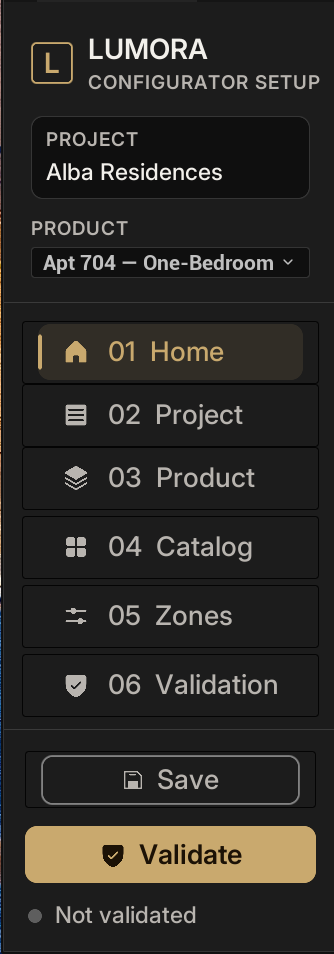
The sidebar has six pages, in order: Home, Project, Product, Catalog, Zones, and Validation. Below them are the Save and Validate buttons and a small status dot (Validated / Not validated). Multipliers are not a separate page; they live on the right side of the Zones page. A barra lateral tem seis páginas, na ordem: Home, Project, Product, Catalog, Zones e Validation. Abaixo delas ficam os botões Save e Validate e um pontinho de status (Validated / Not validated). Multipliers não é uma página à parte; fica no lado direito da página Zones.
Targets: what you are editingTargets: o que você está editando
The tool always works on three "targets" that point to what is currently being edited: A ferramenta sempre trabalha em três "targets" que apontam para o que está sendo editado no momento:
- Target Project — the active project.o projeto ativo.
- Target Product — the active product (must belong to the active project; it is the source of the zones, the variant sets, and the item table).o produto ativo (tem que pertencer ao projeto ativo; é a fonte das zonas, dos variant sets e da tabela de itens).
- Target Items Table — the active product's item table (the Catalog grid reads from and writes to it).a tabela de itens do produto ativo (o grid do Catalog lê e escreve nela).
Selecting a project points all three at once (the project, its first product, and that product's table). Switching product re-points the product and its table. You rarely think about these directly; it just helps to know that "the active product" is what most pages act on. Selecionar um projeto aponta os três de uma vez (o projeto, o primeiro produto dele e a tabela desse produto). Trocar de produto reaponta o produto e a tabela dele. Você raramente pensa nisso diretamente; só ajuda saber que "o produto ativo" é sobre o que a maioria das páginas age.
The Save ruleA regra do Save
Catalog edits and multiplier values live in memory until you press Save in the sidebar. Save commits the open level (the triggers' multipliers) and the item table to disk. If you edit a price or a multiplier and it seems to vanish after closing, it was never saved. Edições do catálogo e valores de multiplicador ficam em memória até você apertar Save na barra lateral. O Save grava no disco o level aberto (os multiplicadores dos triggers) e a tabela de itens. Se você edita um preço ou um multiplicador e ele parece sumir depois de fechar, ele nunca foi salvo.
Some actions save themselves right away: creating a product, zone, or group, and assigning items to groups on the Zones page. Those call Save on their own asset. Everything on the Catalog grid and every multiplier value waits for the Save button. Algumas ações salvam sozinhas na hora: criar um produto, zona ou grupo, e atribuir itens a grupos na página Zones. Essas chamam Save no próprio asset. Tudo no grid do Catalog e todo valor de multiplicador espera o botão Save.
Home page — your projectsPágina Home — os seus projetos
Home is the entry point. Each project lives in its own subfolder under the projects folder, and Home shows one card per project it finds there (subfolders included); the active one gets an Active badge. Projects kept outside that folder will not appear. A Home é a porta de entrada. Cada projeto vive na sua própria subpasta dentro da pasta de projetos, e a Home mostra um card por projeto encontrado ali (subpastas incluídas); o ativo recebe um selo Active. Projetos guardados fora dessa pasta não aparecem.
- New project — type a name and confirm. The tool duplicates a hidden template into a new project and puts all of that project's assets into a folder named after it (the project asset, the product, the items table, one asset per zone, and the client table). It comes in active with the name you typed as its display name. If a project with that name already exists, it warns and does not overwrite.digite um nome e confirme. A ferramenta duplica um template oculto num projeto novo e coloca todos os assets desse projeto numa pasta com o nome dele (o asset do projeto, o produto, a tabela de itens, um asset por zona, e a client table). Ele vem ativo com o nome digitado como display name. Se já existir um projeto com esse nome, ela avisa e não sobrescreve.
- Delete — removes the active project and every asset it owns (each product's zones and table, the products, and the project asset). It asks for confirmation first.remove o projeto ativo e todo asset que ele possui (as zonas e a tabela de cada produto, os produtos e o asset do projeto). Pede confirmação antes.
- Sync (circular arrowseta circular) — re-scans the folder and rebuilds the list, useful when something changed in the Content browser outside the tool.re-escaneia a pasta e reconstrói a lista, útil quando algo mudou no Content browser fora da ferramenta.
Each project's assets land together under …/Configurator/Data/Projects/<ProjectName>/, so you never move assets or create folders by hand. One caveat: New project copies only the first product of the source template. If a source project has more than one product, the extra ones are not duplicated by this flow — add them afterward.Os assets de cada projeto ficam juntos em …/Configurator/Data/Projects/<NomeDoProjeto>/, então você nunca move asset nem cria pasta na mão. Uma ressalva: o New project copia só o primeiro produto do template de origem. Se um projeto de origem tem mais de um produto, os demais não são duplicados por esse fluxo — adicione depois.
Delete removes the project's whole folder (its product, items table, zones, and client table) and nothing outside it — templates and other projects are safe. There is no undo, so make a copy first if you are unsure.O Delete remove a pasta inteira do projeto (o produto, a items table, as zonas e a client table) e nada fora dela — templates e outros projetos ficam seguros. Não há desfazer, então faça uma cópia antes se estiver em dúvida.
Project pagePágina Project
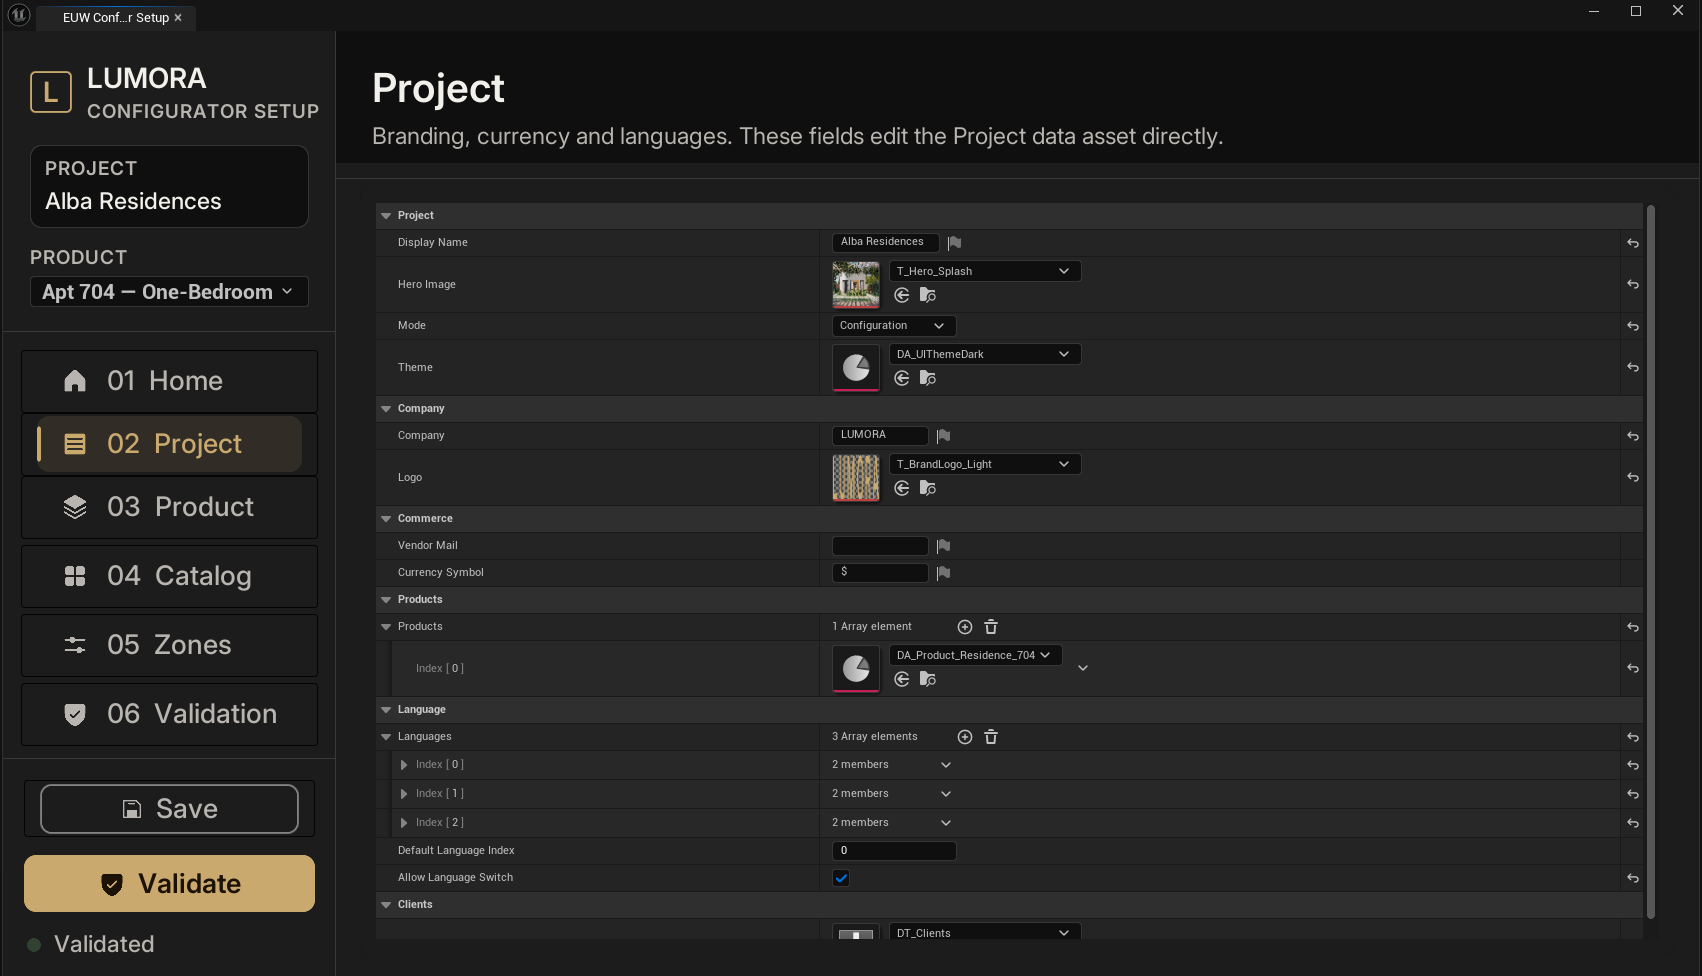
This page edits the active project's fields directly (branding, currency, languages). You do not need to open the data asset by hand. Esta página edita os campos do projeto ativo diretamente (marca, moeda, idiomas). Você não precisa abrir o data asset na mão.
- Project group: Display Name, Hero Image, Mode (Exploration / Configuration), Theme.Grupo Project: Display Name, Hero Image, Mode (Exploration / Configuration), Theme.
- Company group: Company, Logo.Grupo Company: Company, Logo.
- Commerce group: Vendor Mail, Currency Symbol.Grupo Commerce: Vendor Mail, Currency Symbol.
- Products: the products this project offers.Products: os produtos que este projeto oferece.
- Language group: Languages, Default Language Index, Allow Language Switch.Grupo Language: Languages, Default Language Index, Allow Language Switch.
- Clients: the client table (
DT_Clients) used by the login. It must have at least one client for Configuration mode to open (see Client table).Clients: a tabela de clientes (DT_Clients) usada pelo login. Precisa de pelo menos um cliente para o modo Configuration abrir (veja Tabela de clientes).
Full meaning of each field is in the Project field reference.O sentido completo de cada campo está na referência de campos de Project.
Product pagePágina Product
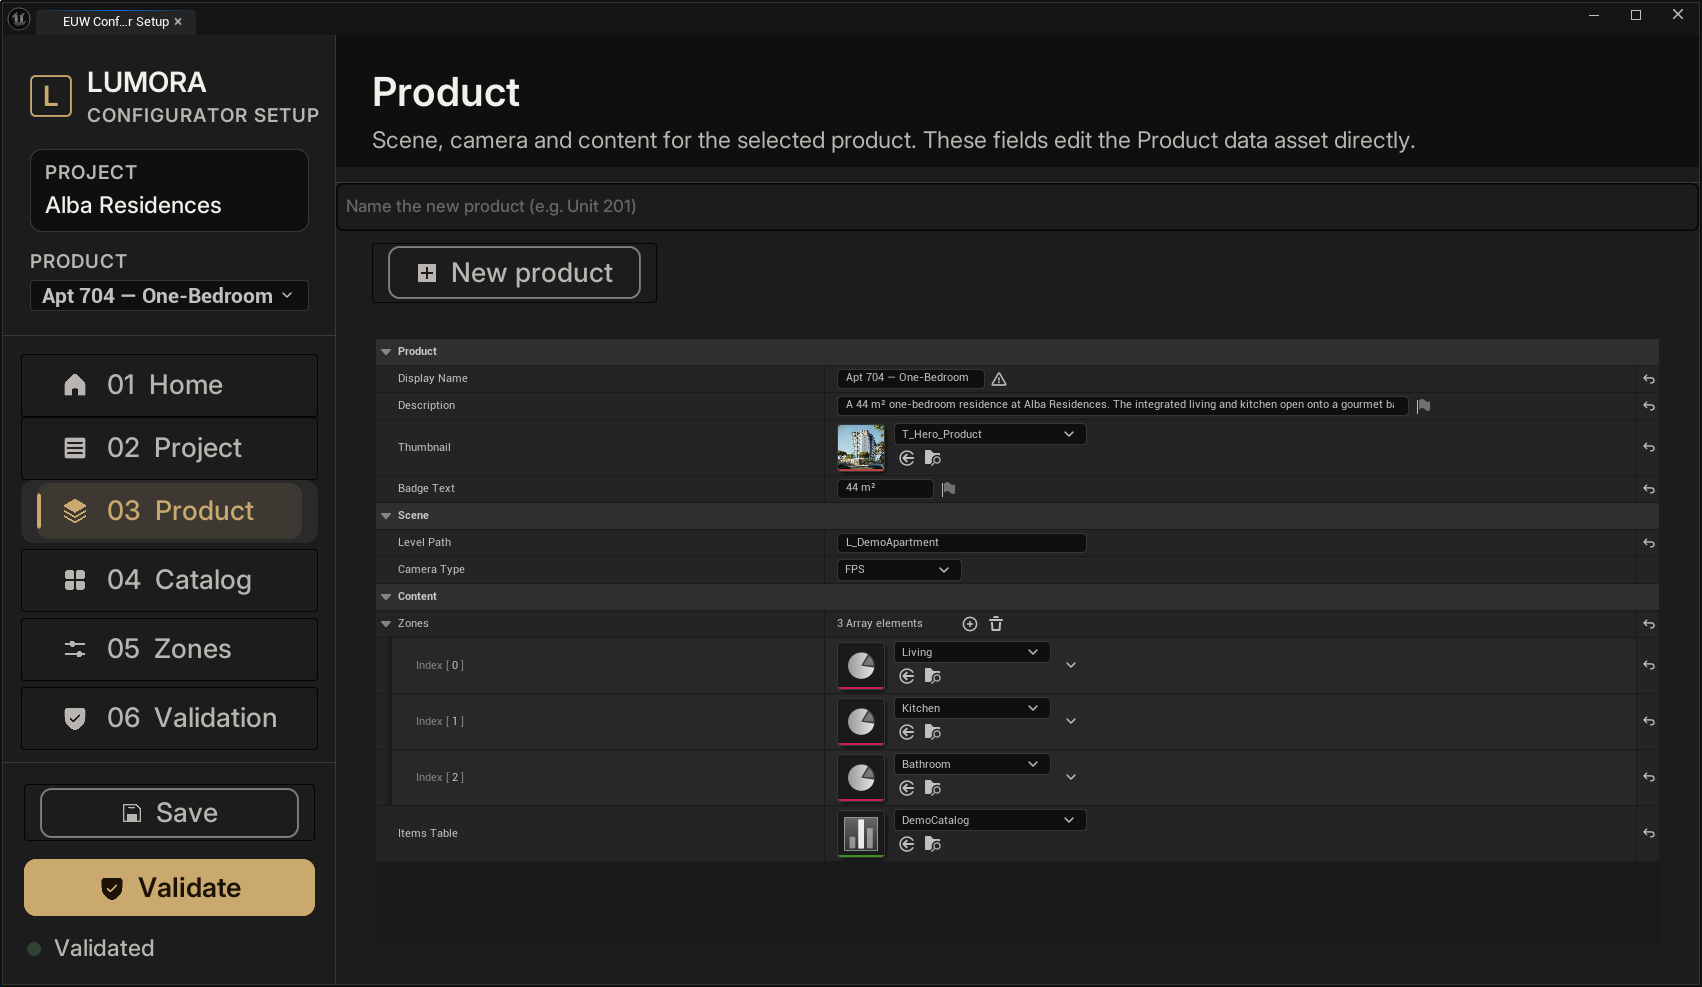
This page picks and edits the active product. The product picker (a dropdown) lists the projects's products by display name; choosing one makes it active, rebuilds the Catalog and Zones pages, and fills the details panel below. Esta página escolhe e edita o produto ativo. O product picker (um dropdown) lista os produtos do projeto por nome de exibição; escolher um o torna ativo, reconstrói as páginas Catalog e Zones, e preenche o painel de detalhes abaixo.
- Details panelPainel de detalhes — edits the product fields directly: display name, description, thumbnail, level path, camera type, item table, and badge text.edita os campos do produto direto: nome de exibição, descrição, thumbnail, level path, tipo de câmera, tabela de itens e texto do selo.
- Zones orderOrdem das zonas — the order of the
Zonesarray here is the order the rooms appear in the runtime zone rail; reorder the array to reorder the rail.a ordem do arrayZonesaqui é a ordem em que os ambientes aparecem no zone rail do runtime; reordene o array para reordenar o rail. - New product — creates a fresh blank product from the template, adds it to the project, and selects it. The name must be unique; it warns if the name is already in use.cria um produto novo em branco a partir do template, adiciona ao projeto e o seleciona. O nome tem que ser único; avisa se o nome já estiver em uso.
The active product is chosen in the PRODUCT dropdown at the top of the sidebar; it stays visible on every page.O produto ativo é escolhido no dropdown PRODUCT no topo da barra lateral; ele fica visível em todas as páginas.
Catalog page — the item gridPágina Catalog — o grid de itens
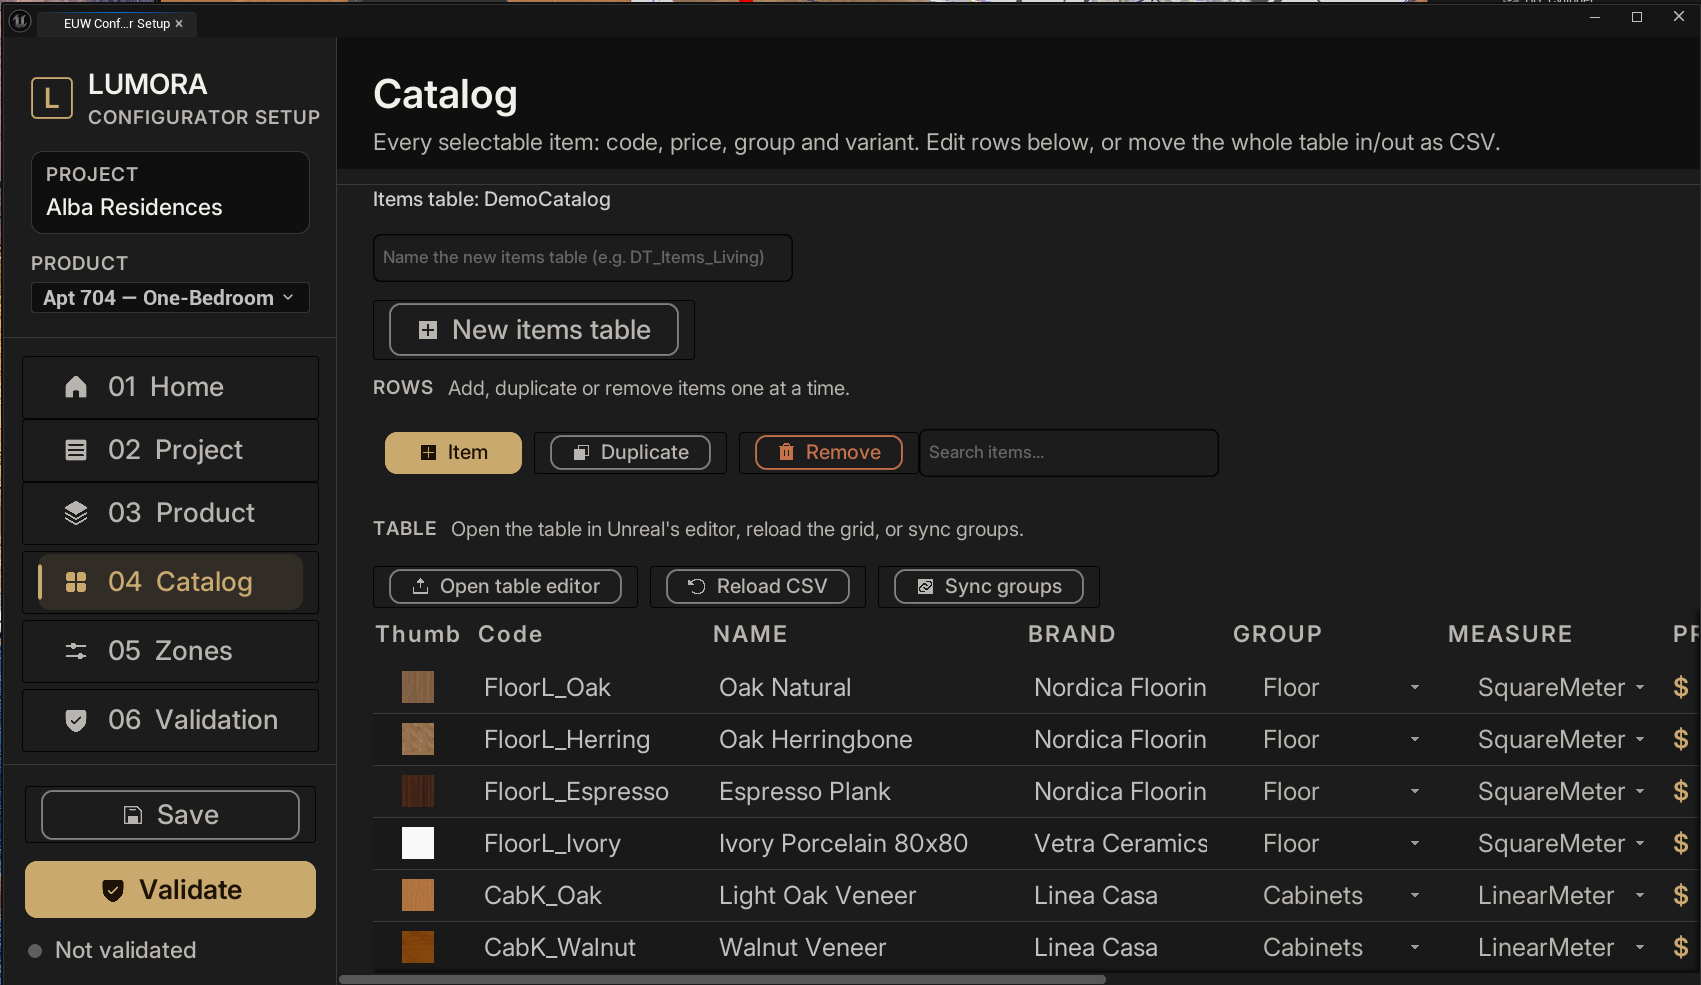
The Catalog is the heart of your setup: a grid where each row is one item from the item table. The rows themselves are the working copy of your catalog, and Save rebuilds the table from them. Columns are thumbnail (clickable), display name, brand, measure, price, group (dropdown), variant (clickable cell), and description. The grid scrolls horizontally. O Catalog é o coração do seu setup: um grid onde cada linha é um item da tabela de itens. As próprias linhas são a cópia de trabalho do seu catálogo, e o Save reconstrói a tabela a partir delas. As colunas são thumbnail (clicável), nome de exibição, marca, medida, preço, grupo (dropdown), variante (célula clicável) e descrição. O grid rola na horizontal.
Why the grid is your catalogPor que o grid é o seu catálogo
Each row is one item, and the rows are the working copy the tool keeps in memory. Save rebuilds the whole item table from them, so an edit only becomes permanent after Save. A row's code (its name) is the unique key that groups use to reference the item, which is why Duplicate leaves the code blank for you to fill and why two rows can never share a code. Cada linha é um item, e as linhas são a cópia de trabalho que a ferramenta mantém em memória. O Save reconstrói a tabela de itens inteira a partir delas, então uma edição só fica permanente depois do Save. O código de uma linha (o nome dela) é a chave única que os grupos usam para referenciar o item, por isso o Duplicate deixa o código em branco para você preencher e por isso duas linhas nunca podem ter o mesmo código.
Adding your first itemAdicionando o seu primeiro item
Press Add, then type a code, display name, brand, measure, and price. Set its Group (the dropdown lists the groups you built on the Zones page), pick a thumbnail, and optionally link a variant. Press Save. Reopen the runtime and the item shows up inside that group, in every room whose group lists its code. Aperte Add, depois digite um código, nome de exibição, marca, medida e preço. Defina o Group (o dropdown lista os grupos que você montou na página Zones), escolha um thumbnail e, se quiser, ligue uma variante. Aperte Save. Reabra o runtime e o item aparece dentro daquele grupo, em todo ambiente cujo grupo lista o código dele.
The catalog and the zones reference each otherO catálogo e as zonas se referenciam
There is a two-way link here that trips people up. An item's Group comes from the groups you build on the Zones page, and a group is filled with catalog item codes. So neither side is fully fillable before the other exists: with no zones yet, the Group dropdown has nothing to offer; with no items yet, a group has nothing to add. Existe aqui um vínculo de mão dupla que confunde as pessoas. O Group de um item vem dos grupos que você monta na página Zones, e um grupo é preenchido com códigos de item do catálogo. Então nenhum dos dois lados é totalmente preenchível antes do outro existir: sem zonas ainda, o dropdown Group não tem o que oferecer; sem itens ainda, um grupo não tem o que adicionar.
In practice you rarely set Group by hand. When you add an existing item to a group on the Zones page, its catalog Group is written automatically — you do not come back here to say which group it belongs to. And when you create a new item on the Catalog, you can pick its Group right here, since the groups already exist. If the two ever drift apart, Sync groups reconciles the Group column from the zones (it sweeps both root and dependent groups).Na prática você quase nunca define o Group na mão. Quando você adiciona um item existente a um grupo na página Zones, o Group dele no catálogo é escrito automaticamente — você não volta aqui para dizer a que grupo ele pertence. E quando você cria um item novo no Catalog, dá para escolher o Group aqui mesmo, já que os grupos já existem. Se os dois lados divergirem, o Sync groups reconcilia a coluna Group a partir das zonas (ele varre grupos root e dependentes).
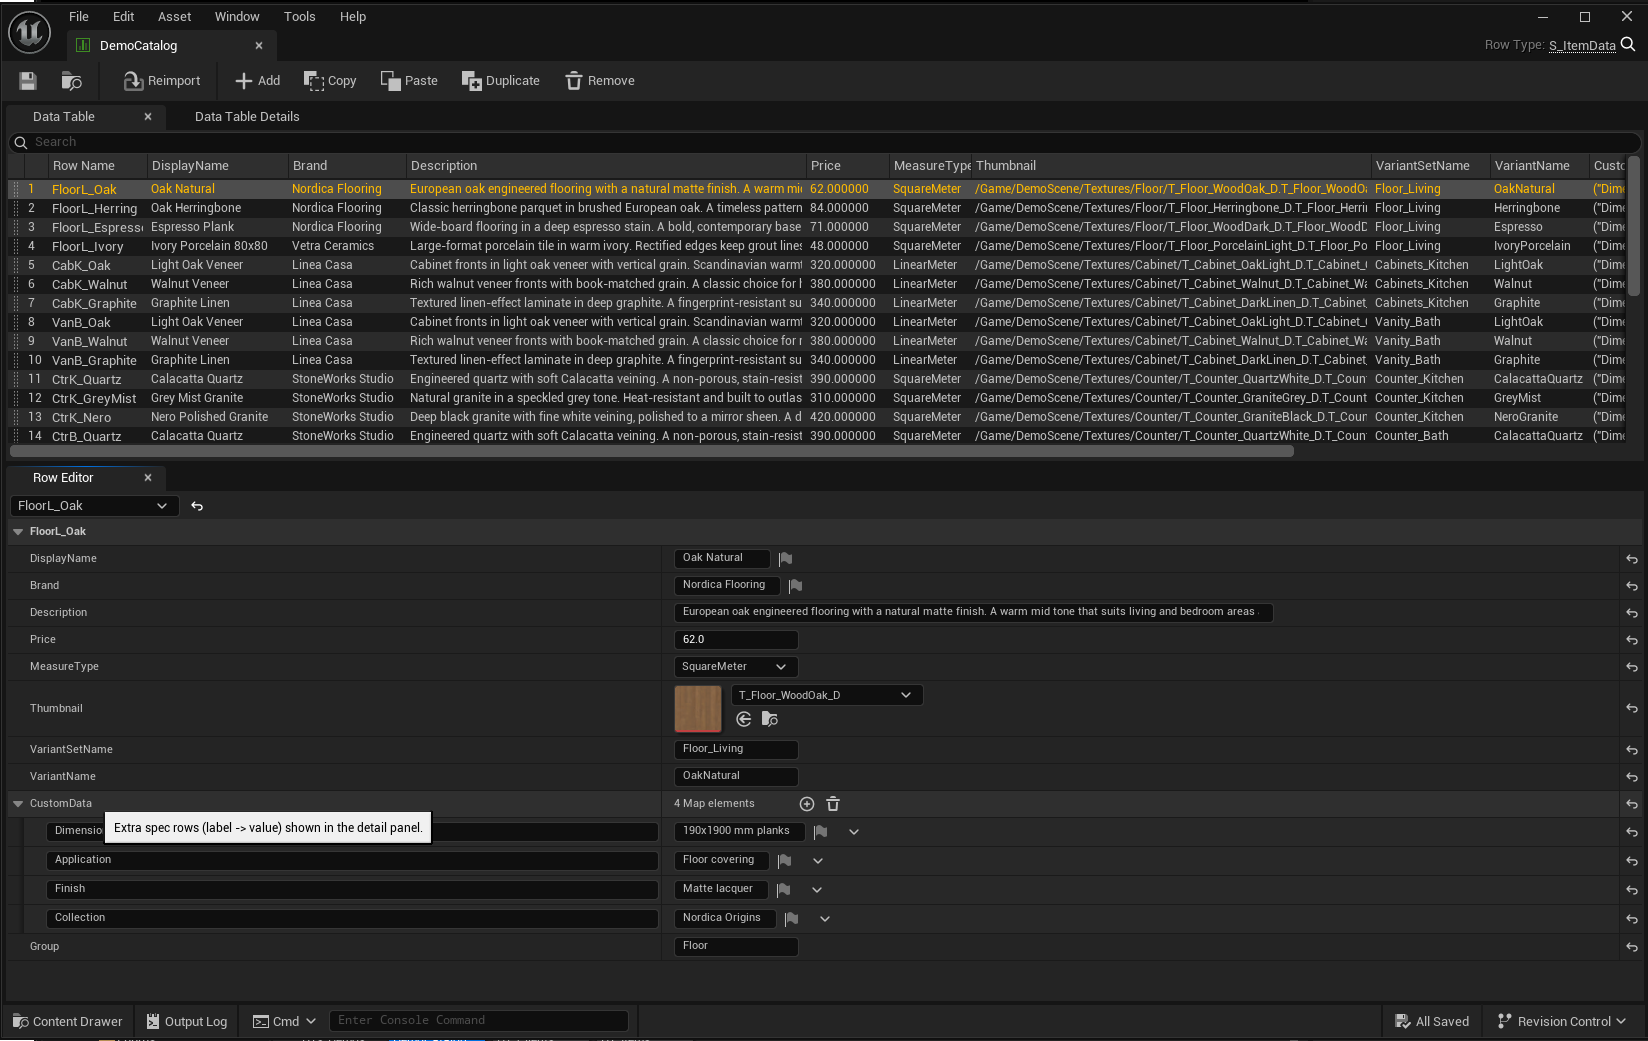
Almost every item field edits right here in the Catalog grid, including Thumbnail, Description, and MeasureType. The one exception is CustomData (the detail-panel spec lines), which you set in the DataTable — see Custom specs.Quase todo campo do item edita aqui mesmo no grid do Catalog, inclusive Thumbnail, Description e MeasureType. A única exceção é o CustomData (as linhas de spec do painel de detalhe), que você define na DataTable — veja Specs customizadas.
Setting a Group and a price makes an item selectable and priced, but the 3D scene only swaps when the item has a Variant Set + Variant linked in its Variant cell. An item with no variant still sells and prices normally; it just changes nothing visually. See Variants & visual swaps for how to set them up.Definir um Group e um preço deixa o item selecionável e com preço, mas a cena 3D só troca quando o item tem um Variant Set + Variant atrelados na célula Variant dele. Um item sem variante ainda vende e precifica normalmente; ele só não muda nada visualmente. Veja Variantes e trocas visuais para como configurá-los.
Custom specs (the detail panel's spec lines)Specs customizadas (as linhas de spec do painel de detalhe)
The runtime detail panel shows a spec line per custom attribute of the item, like Finish: Matte or Application: Internal walls. These come from the item's CustomData, a map of key → value pairs. O painel de detalhe do runtime mostra uma linha de spec por atributo custom do item, como Acabamento: Matte ou Aplicação: Paredes Internas. Elas vêm do CustomData do item, um mapa de pares chave → valor.
CustomData is not editable in the setup tool's grid yet, so you fill it in the Data Table directly:
O CustomData ainda não é editável no grid da ferramenta de setup, então você preenche direto na Data Table:
- On the Catalog page, click Open items table editor.Na página Catalog, clique em Open items table editor.
- Select the item's row. In the Row Editor, expand CustomData.Selecione a linha do item. No Row Editor, expanda o CustomData.
- Add a Map element for each spec: the key is the label (for example
Finish), the value is the value (for exampleMatte).Adicione um Map element para cada spec: a chave é o rótulo (por exemploAcabamento), o valor é o valor (por exemploMatte). - Save. Back in the tool, press Reload if you had the catalog open.Salve. De volta na ferramenta, aperte Reload se o catálogo estava aberto.
The Localization Dashboard only translates the template's fixed UI strings. Text you type into the DataTable or the Catalog (item names, descriptions, CustomData values) is not translated automatically — if you need it in more than one language, provide the translations yourself.O Localization Dashboard traduz só os textos fixos da UI do template. O que você digita na DataTable ou no Catalog (nomes de item, descrições, valores de CustomData) não é traduzido automaticamente — se precisar em mais de um idioma, forneça as traduções você mesmo.
ActionsAções
- Search — filters rows whose code, display name, or brand contain the text.filtra as linhas cujo código, nome de exibição ou marca contêm o texto.
- Add — appends an empty row (it only reaches the table on Save).acrescenta uma linha vazia (ela só chega na tabela no Save).
- Duplicate — clones the selected row into a new one, leaving the code blank on purpose (item codes are the row names and must be unique).clona a linha selecionada numa nova, deixando o código em branco de propósito (os códigos são os nomes de linha e têm que ser únicos).
- Remove — asks for confirmation, then drops the selected row from the grid.pede confirmação e tira a linha selecionada do grid.
- Group (per-row dropdowndropdown por linha) — sets the item's group; options come from the root groups of every zone in the product.define o grupo do item; as opções vêm dos root groups de todas as zonas do produto.
- Variant (per-row cellcélula por linha) — opens the variant picker (two cascading dropdowns, Set → Variant, from the level's variant sets). Apply saves the pair; Unlink clears it so the item stops driving a variant.abre o variant picker (dois dropdowns em cascata, Set → Variant, dos variant sets do level). Apply grava o par; Unlink limpa para o item parar de dirigir uma variante.
- Thumbnail (per-row cellcélula por linha) — sets the item's thumbnail in the grid. For the underlying object-path format, see Filling DT_Items.define o thumbnail do item no grid. Para o formato de caminho de objeto por trás, veja Preencher o DT_Items.
- Open items table editor — opens the DataTable in Unreal's native editor, where you can Import / Export / Reimport a CSV from the toolbar (no plugin needed).abre a DataTable no editor nativo da Unreal, onde dá para Import / Export / Reimport de um CSV pela toolbar (sem plugin).
- Reload — clears the grid and rebuilds it from the table. Use it after reimporting a CSV so the changes show without reopening the tool.limpa o grid e reconstrói a partir da tabela. Use depois de reimportar um CSV para as mudanças aparecerem sem reabrir a ferramenta.
- Sync groups — reconciles the table's Group column: for each row it finds which zone group lists that code (root or dependent) and writes that group back. Keeps items consistent with the zones.reconcilia a coluna Group da tabela: para cada linha, descobre qual grupo de zona lista aquele código (root ou dependente) e grava esse grupo de volta. Mantém os itens consistentes com as zonas.
- New items table — creates a new empty item table from the template, assigns it to the product, and reloads the catalog. It needs a unique name and warns if the name is already in use.cria uma tabela de itens nova e vazia a partir do template, atribui ao produto e recarrega o catálogo. Precisa de um nome único e avisa se o nome já estiver em uso.
Type items in row by row, or import a CSV through Open items table editor and then press Reload. For large catalogs the CSV route is faster.Digite os itens linha a linha, ou importe um CSV por Open items table editor e depois aperte Reload. Para catálogos grandes o caminho do CSV é mais rápido.
The grid columns have fixed widths (they do not auto-size to the content); Thumbnail, Variant, and Description are the widest. A long code, brand, variant, or description can clip in the cell — the full text shows when you click to edit it. As colunas do grid têm largura fixa (não se ajustam sozinhas ao conteúdo); Thumbnail, Variant e Description são as mais largas. Um código, marca, variante ou descrição longos podem cortar na célula — o texto completo aparece ao clicar para editar.
Two things trip people up with Sync groups: it does not update while the items DataTable is open in the editor (close the table first), and after you press it the on-screen list only refreshes when you switch tabs and come back — the data was already written, it is just a visual refresh.Duas coisas confundem no Sync groups: ele não atualiza enquanto a DataTable de itens estiver aberta no editor (feche a tabela antes), e depois de apertar, a lista na tela só atualiza quando você troca de aba e volta — os dados já foram gravados, é só um refresh visual.
Groups store their items by code (RowName). If you reimport the item table with codes renamed, the groups still point at the old codes, which no longer exist, so those items show up group-less even though the groups are still built. Only items whose code did not change survive. Rule of thumb: do not rename codes after building groups — or rebuild the affected groups right after (re-add the items, or delete and recreate the group).Os grupos guardam os itens por código (RowName). Se você reimporta a tabela com os códigos renomeados, os grupos continuam apontando para os códigos antigos, que não existem mais, então esses itens aparecem sem grupo mesmo com os grupos montados. Só sobrevivem os itens cujo código não mudou. Regra prática: não renomeie códigos depois de montar os grupos — ou refaça os grupos afetados em seguida (readicione os itens, ou apague e recrie o grupo).
Zones page — rooms, groups, and multipliersPágina Zones — ambientes, grupos e multiplicadores
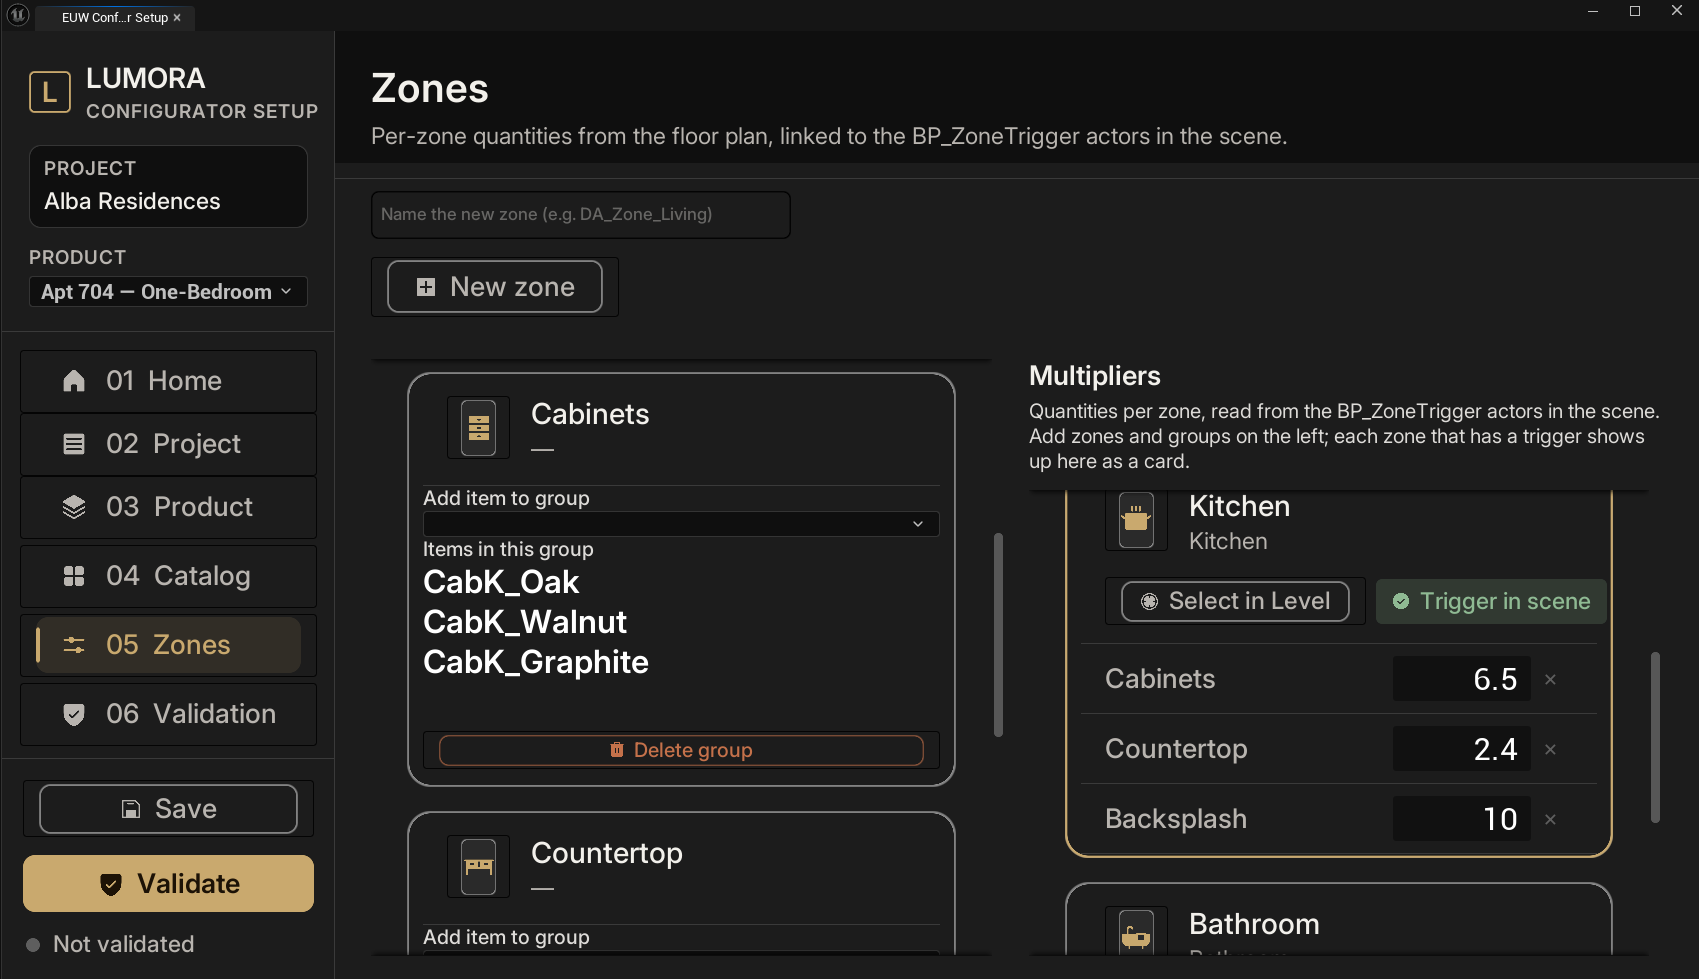
This one page builds the rooms, their option groups, the items in each group, and the per-zone multipliers. At the top you name and create zones. The left column holds the group cards of the selected zone; the right column, Multipliers, lists the zones that have a trigger. Esta única página monta os ambientes, os grupos de opção deles, os itens de cada grupo e os multiplicadores por zona. No topo você nomeia e cria zonas. A coluna da esquerda tem os group cards da zona selecionada; a coluna da direita, Multipliers, lista as zonas que têm trigger.
Group cards (left)Group cards (esquerda)
The group cards appear once you select a zone — click its card in the Multipliers column on the right. Before a zone is selected, the groups area is empty.Os group cards aparecem depois que você seleciona uma zona — clique no card dela na coluna Multipliers, à direita. Antes de selecionar uma zona, a área de grupos fica vazia.
Each group of the selected zone is a card. On the card you have everything for that group in one place: Cada grupo da zona selecionada é um card. No card você tem tudo daquele grupo num lugar só:
- New zone — type a name (e.g.
DA_Zone_Living) and click New zone to create the room. The name must be unique and non-empty; it warns if the name is already in use.digite um nome (ex.DA_Zone_Living) e clique em New zone para criar o ambiente. O nome tem que ser único e não vazio; avisa se o nome já estiver em uso. - New group — type a name in Name a new group and click New group. It adds a root group card. There is no in-place rename: to rename a group, delete it and create it again.digite um nome em Name a new group e clique em New group. Isso adiciona um card de grupo root. Não há renomear no lugar: para renomear um grupo, apague e crie de novo.
- The group cardO card do grupo — shows the group's icon and name, an Add item to group dropdown, an Items in this group list, and a Delete group button (delete is immediate, with no confirmation).mostra o ícone e o nome do grupo, um dropdown Add item to group, uma lista Items in this group, e um botão Delete group (apagar é imediato, sem confirmação).
- Add item to group — the dropdown lists every item code in the product's table; picking one adds it to that group (duplicates ignored) and writes the item's Group in the catalog automatically.o dropdown lista todos os códigos de item da tabela do produto; escolher um adiciona ao grupo (repetidos ignorados) e escreve o Group do item no catálogo automaticamente.
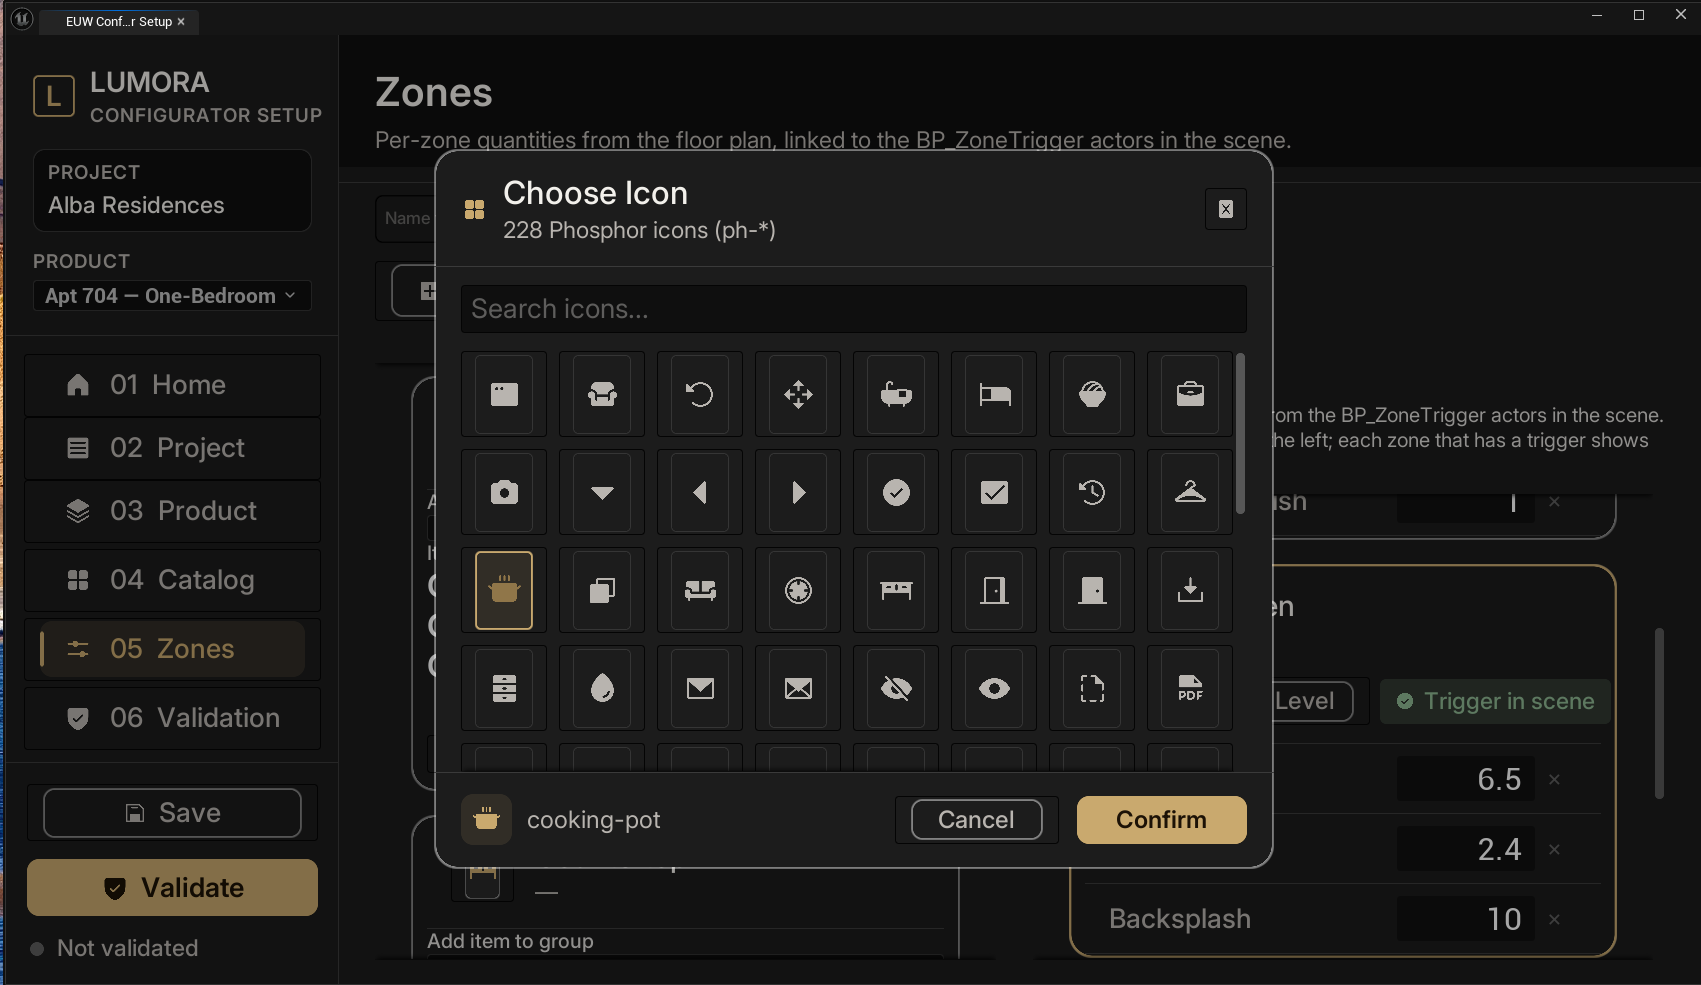
- Group iconÍcone do grupo — click the card's icon to open the icon picker (228 Phosphor
ph-*icons, with search and Confirm). The icon shows on the card and on the category bar in the product's runtime.clique no ícone do card para abrir o icon picker (228 ícones Phosphorph-*, com busca e Confirm). O ícone aparece no card e na barra de categorias do runtime do produto.
The card only adds items; there is no per-item remove yet. To take an item out of a group, edit the zone's ItemRows in the asset, or delete the group and recreate it with the items you want.O card só adiciona itens; ainda não há remover item a item. Para tirar um item de um grupo, edite os ItemRows da zona no asset, ou apague o grupo e recrie com os itens que você quer.
New group creates root groups (always visible). Dependent groups (the ones that appear only after a specific item is chosen) are made in the zone asset, not here — see Root vs dependent groups.O New group cria grupos root (sempre visíveis). Grupos dependentes (os que aparecem só depois de um item específico ser escolhido) são feitos no asset da zona, não aqui — veja Grupos root x dependentes.
Multipliers (right)Multipliers (direita)
The right column, headed Multipliers, reads the BP_ZoneTrigger actors in the scene: each zone that has a trigger shows up as a card. On the card, Select in Level selects that trigger, a Trigger in scene chip shows it is linked, and there is one value row per group (for example Cabinets 6.5, Countertop 2.4, Backsplash 10).
A coluna da direita, com o título Multipliers, lê os atores BP_ZoneTrigger da cena: cada zona que tem trigger aparece como um card. No card, o Select in Level seleciona aquele trigger, um chip Trigger in scene mostra que está ligado, e há uma linha de valor por grupo (por exemplo Cabinets 6.5, Countertop 2.4, Backsplash 10).
- A zone with no trigger shows a No trigger state; Create trigger spawns a
BP_ZoneTrigger, links it to the zone, and turns the card to Trigger in scene. You then reposition the trigger over the room.Uma zona sem trigger mostra o estado No trigger; o Create trigger cria umBP_ZoneTrigger, liga à zona e vira o card para Trigger in scene. Depois você reposiciona o trigger sobre o ambiente. - Type the value per group: the floor area for items priced per m², the count for items priced per unit. Editing writes into the trigger in memory — nothing reaches disk until you press Save.Digite o valor por grupo: a área do piso para itens por m², a quantidade para itens por unidade. Editar escreve no trigger em memória — nada chega ao disco até você apertar Save.
Dependent groups are priced like root groups, so each also needs a multiplier. Their rows appear on the card only when the root group they depend on is selected, matching how they surface in the runtime. A dependent group with no multiplier prices its items at zero.Grupos dependentes precificam como os root groups, então cada um também precisa de multiplicador. As linhas deles aparecem no card só quando o root group do qual dependem está selecionado, igual ao jeito que surgem no runtime. Um grupo dependente sem multiplicador precifica os itens a zero.
A brand-new group starts at multiplier 0, which trips the validation warning (its items would price at x0) — that is on purpose, a reminder to set the value. And deleting a group then recreating it with the same name brings back its old multiplier, because multipliers are stored per group name, outside the group itself.Um grupo recém-criado começa com multiplicador 0, o que dispara o aviso de validação (os itens dele precificariam a x0) — isso é de propósito, um lembrete para definir o valor. E apagar um grupo e recriá-lo com o mesmo nome traz de volta o multiplicador antigo, porque os multiplicadores ficam guardados por nome de grupo, fora do grupo em si.
Building a zone, start to finishMontando uma zona, do início ao fim
Create the zone, add its groups, drop items into each group, create its trigger in the scene, then set the multipliers. A zone with groups but no trigger prices its items at zero, so the trigger step is not optional. The order matters only in that the trigger and multipliers come after the groups exist. Crie a zona, adicione os grupos dela, coloque itens em cada grupo, crie o trigger dela na cena, depois defina os multiplicadores. Uma zona com grupos mas sem trigger precifica os itens a zero, então o passo do trigger não é opcional. A ordem só importa no sentido de que o trigger e os multiplicadores vêm depois de os grupos existirem.
Root groups vs. dependent groups, in practiceRoot groups x dependent groups, na prática
Root groups always show in the room and are made here. A dependent group stays hidden until a specific item unlocks it (its DependsOn), and it is made in the zone asset, not on this page. Full steps and a worked sofa example are under Root vs dependent groups.
Root groups sempre aparecem no ambiente e são feitos aqui. Um dependent group fica escondido até um item específico destravá-lo (o DependsOn dele), e é feito no asset da zona, não nesta página. Os passos completos e um exemplo de sofá estão em Grupos root x dependentes.
Validation pagePágina Validation
Validation runs every check and writes a report. Clear everything (0 issues) and you get the Validated badge. Run it before you publish, and any time the runtime behaves oddly. It checks for: A Validation roda todas as checagens e escreve um relatório. Zere tudo (0 problemas) e você ganha o selo Validated. Rode antes de publicar, e sempre que o runtime se comportar estranho. Ela checa:
- duplicate item code;código de item duplicado;
- item with no group;item sem grupo;
- a group that no zone declares;um grupo que nenhuma zona declara;
- a variant Set + Variant pair missing from the level's variants;um par de variante Set + Variant ausente das variantes do level;
- a root group with no multiplier (its items would price at zero);um root group sem multiplicador (os itens dele precificariam a zero);
- an item listed in a zone but missing from the item table;um item listado numa zona mas ausente da tabela de itens;
- any zone in the product with no Zone Trigger in the scene (its multipliers would be unreachable, price zero).qualquer zona do produto sem Zone Trigger na cena (os multiplicadores seriam inalcançáveis, preço zero).
How to use itComo usar
Go to the Validation page and press the Validate button (under the sidebar). The report lists every issue by type. Work down the list: each line points at a catalog row, a group, a zone, or a variant pair to fix. Fix it, press Validate again, and repeat until the count hits zero, the status dot reads Validated. Then press Save. Vá para a página Validation e aperte o botão Validate (embaixo da barra lateral). O relatório lista cada problema por tipo. Vá descendo a lista: cada linha aponta para uma linha do catálogo, um grupo, uma zona ou um par de variante a corrigir. Corrija, aperte Validate de novo, e repita até a contagem zerar e o pontinho de status mostrar Validated. Depois aperte Save.
Run validation before every publish, and any time the runtime prices something wrong or a room comes up empty. It is the fastest way to find a missing multiplier, a mistyped code, or a zone with no trigger. Rode a validação antes de cada publicação, e sempre que o runtime precificar algo errado ou um ambiente aparecer vazio. É o jeito mais rápido de achar um multiplicador faltando, um código digitado errado, ou uma zona sem trigger.
Validation reads the triggers and the variant sets from the level that is currently open in the editor. If you have an active project loaded but the open level is not that product's level (or is the empty startup scene), it will report triggers missing and variants it cannot check. That is expected: open the product's level, then validate.A Validation lê os triggers e os variant sets do level que está aberto no momento no editor. Se você tem um projeto ativo carregado mas o level aberto não é o daquele produto (ou é a cena vazia inicial), ela vai acusar triggers faltando e variantes que não consegue checar. Isso é esperado: abra o level do produto, depois valide.
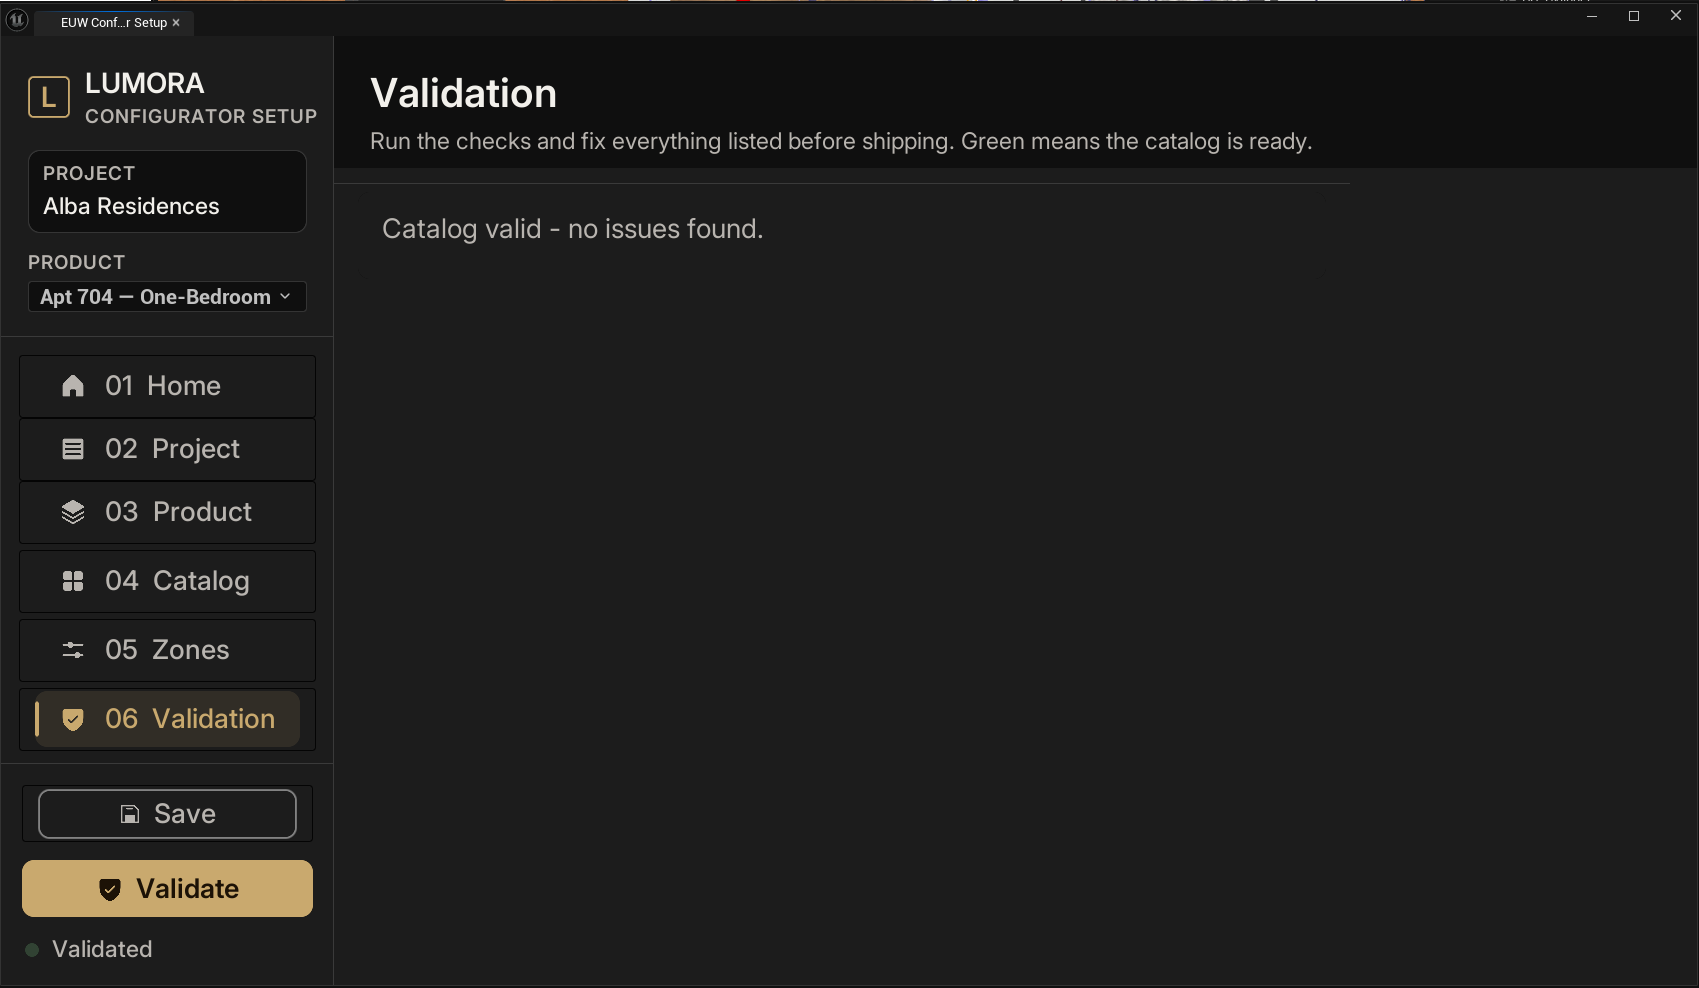
Once Validation is clean, press Save in the sidebar to commit the level (trigger multipliers) and the item table. Save is the commit; individual edits do not persist on their own.Com a Validation limpa, aperte Save na barra lateral para gravar o level (multiplicadores dos triggers) e a tabela de itens. O Save é o commit; as edições individuais não persistem sozinhas.
Variants & visual swapsVariantes e trocas visuais
A variant is the 3D scene reacting to a choice: pick "Oak floor" and the floor material changes. Without variants, catalog items are still selectable and priced, but nothing in the scene changes when the customer picks them. Uma variante é a cena 3D reagindo a uma escolha: escolha "Piso de carvalho" e o material do piso muda. Sem variantes, os itens do catálogo continuam selecionáveis e com preço, mas nada na cena muda quando o cliente os escolhe.
Where variants liveOnde as variantes moram
Variants live in a LevelVariantSets asset inside the product's level, through Unreal's Variant Manager. A Variant Set is a category (for example "Floor"), and each Variant inside it is one option (Oak, Marble). The setup tool reads these; it does not create them. So the product's level needs a LevelVariantSets before the Catalog can link anything to a visual swap. As variantes ficam num asset LevelVariantSets dentro do level do produto, pelo Variant Manager da Unreal. Um Variant Set é uma categoria (por exemplo "Piso"), e cada Variant dentro dele é uma opção (Carvalho, Mármore). A ferramenta de setup lê isso; ela não cria. Então o level do produto precisa de um LevelVariantSets antes do Catalog conseguir ligar algo a uma troca visual.
If the level has no LevelVariantSets, the Variant column has nothing to offer, and Validation reports it cannot check variants (treated as "no swap available", not an error).Se o level não tem LevelVariantSets, a coluna Variant não tem o que oferecer, e a Validation avisa que não dá para checar variantes (tratado como "sem troca disponível", não como erro).
Creating a Variant SetCriar um Variant Set
This is the standard Unreal Variant Manager workflow, done once per product level: Este é o fluxo padrão do Variant Manager da Unreal, feito uma vez por level de produto:
- Open the level's LevelVariantSets asset (or create one and place it in the level).Abra o asset LevelVariantSets do level (ou crie um e coloque no level).
- Add a Variant Set for each category the customer chooses from (Floor, Wall, Cabinet).Adicione um Variant Set para cada categoria que o cliente escolhe (Piso, Parede, Armário).
- Inside each set, add a Variant per option, and capture the properties it changes (a material, a mesh, visibility).Dentro de cada set, adicione uma Variant por opção, e capture as propriedades que ela muda (um material, uma mesh, visibilidade).
- Save the level. The setup tool now lists these sets and variants in the Catalog's Variant picker.Salve o level. A ferramenta de setup agora lista esses sets e variants no picker Variant do Catalog.
The steps above are the generic Variant Manager flow. If the template ships with a specific setup or naming convention for its variant sets, follow that; a screenshot of the demo level's LevelVariantSets makes a good reference.Os passos acima são o fluxo genérico do Variant Manager. Se o template já vem com um setup ou convenção de nomes específicos para os variant sets, siga isso; um print do LevelVariantSets do level de demonstração serve de referência.
Linking an item to a variantLigar um item a uma variante
On the Catalog page, the item's Variant cell opens the picker: two cascading dropdowns, Set then Variant. Apply writes the pair into the item; Unlink clears it. An item with no variant set drives no swap (it still sells and prices normally). At runtime, choosing that item switches the scene to its variant. Na página Catalog, a célula Variant do item abre o picker: dois dropdowns em cascata, Set e depois Variant. Apply grava o par no item; Unlink limpa. Um item sem variant set não dirige troca (ele ainda vende e precifica normalmente). No runtime, escolher esse item troca a cena para a variante dele.
Validation flags any Set + Variant pair on an item that does not exist in the level's variants, so a typo or a renamed set gets caught before publish. A Validation sinaliza qualquer par Set + Variant num item que não exista nas variantes do level, então um erro de digitação ou um set renomeado é pego antes de publicar.
Step-by-step setupPasso a passo
From an empty project to a running configurator. Each step says what to click, what you should see, and leaves a spot for a short screen recording. Do them in order the first time; after that you jump straight to the page you need. Remember the Save rule: catalog and multiplier edits stay in memory until you press Save. De um projeto vazio a um configurador rodando. Cada passo diz o que clicar, o que você deve ver, e deixa um espaço para uma gravação de tela curta. Faça na ordem na primeira vez; depois você vai direto para a página que precisa. Lembre da regra do Save: edições de catálogo e multiplicador ficam em memória até você apertar Save.
The whole flow starts in the setup tool, on the Home page, with New project (step 1). Everything after that happens on the sidebar pages, top to bottom. You don't edit any asset by hand to get going.O fluxo inteiro começa na ferramenta de setup, na página Home, com New project (passo 1). Tudo depois disso acontece nas páginas da barra lateral, de cima para baixo. Você não edita nenhum asset na mão para começar.
The tool clones and edits the project's assets for you, but a few things have to exist before it can point at them. Have these ready first:A ferramenta clona e edita os assets do projeto para você, mas algumas coisas precisam existir antes de ela poder apontar para elas. Tenha isto pronto primeiro:
- Your product level — the 3D scene the product opens. Build or import it in Unreal as usual; step 3 just points the product at it.O level do seu produto — a cena 3D que o produto abre. Monte ou importe na Unreal como sempre; o passo 3 só aponta o produto para ela.
- Visual variants (if you want scene changes) — the level needs a
LevelVariantSetsbuilt in the Variant Manager. The tool only links to variants that already exist, so make them before step 7 (see Creating a Variant Set).Variantes visuais (se você quer mudanças na cena) — o level precisa de umLevelVariantSetsmontado no Variant Manager. A ferramenta só liga a variantes que já existem, então crie-as antes do passo 7 (veja Criar um Variant Set). - Your item list — codes, names, brands, prices, and measures. Type them in step 4, or have a CSV ready to import in one shot.Sua lista de itens — códigos, nomes, marcas, preços e medidas. Digite no passo 4, ou tenha um CSV pronto para importar de uma vez.
The setup tool covers the whole catalog, but these are done in other parts of Unreal (each has its own section here):A ferramenta de setup cobre o catálogo inteiro, mas isto é feito em outras partes da Unreal (cada um tem a sua própria seção aqui):
- Variant Sets and variants — created in the Variant Manager panel on the product level, not in the tool (Variants).Variant Sets e variantes — criados no painel Variant Manager no level do produto, não na ferramenta (Variantes).
- CustomData spec lines — the extra spec rows on the detail panel are typed in the items Data Table, not the Catalog grid (Custom specs).Linhas de spec do CustomData — as linhas de spec extras no painel de detalhe são digitadas na Data Table de itens, não no grid do Catalog (Specs customizadas).
- New language cultures — a language you add to the project also needs its culture compiled in the Localization Dashboard (Languages).Culturas de idioma novas — um idioma que você adiciona ao projeto também precisa da cultura compilada no Localization Dashboard (Idiomas).
- The startup fallback — which project the packaged build loads when none is set comes from the
StartupProjectand the Game Default Map in Project Settings (Configuring a new project).O fallback de inicialização — qual projeto o build empacotado carrega quando nenhum está definido vem doStartupProjecte do Game Default Map em Project Settings (Configurando um projeto novo). - Sending the order out — the CRM / email integration is wired in the
SendVendorEmailandOnOrderConfirmedhooks (Order data & export).Enviar o pedido para fora — a integração de CRM / e-mail é ligada nos hooksSendVendorEmaileOnOrderConfirmed(Dados do pedido e export).
- Create the projectCriar o projeto
- Fill in the projectPreencher o projeto
- Create or adjust the productCriar ou ajustar o produto
- Build the item catalogMontar o catálogo
- Create the roomsCriar os ambientes
- Build groups and add itemsMontar grupos e adicionar itens
- Link visual variants (optional)Ligar variantes visuais (opcional)
- Place the zone triggersColocar os zone triggers
- Set the multipliersDefinir os multiplicadores
- ValidateValidar
- SaveSalvar
- Test in PlayTestar em Play
-
Create the projectCriar o projeto
A project is the top of your catalog. You start by cloning a fresh one from the template.Um projeto é o topo do seu catálogo. Você começa clonando um novo a partir do template.
- Open the setup tool (how to open it) and go to the Home page.Abra a ferramenta de setup (como abrir) e vá para a página Home.
- Click New project, type a name, and confirm. The tool warns you if the name already exists.Clique em New project, digite um nome e confirme. A ferramenta avisa se o nome já existe.
You'll see: a new project card with an Active badge, and all of its assets organized in a folder named after the project. It is cloned from the template and still points at the demo level; you re-point that at step 3.Você verá: um card de projeto novo com o selo Active, e todos os assets dele organizados numa pasta com o nome do projeto. Ele é clonado do template e ainda aponta para o level de demonstração; você reaponta isso no passo 3.
🎬images/vid-01-create-project.mp4Screen recording: Home → New project → name → Active card appearsGravação: Home → New project → nome → card Active apareceCreating a new project on the Home page.Criando um projeto novo na página Home. -
Fill in the projectPreencher o projeto
These fields set the branding, the money, and the languages for the whole project.Estes campos definem a marca, o dinheiro e os idiomas do projeto todo.
- Go to the Project page (02 in the sidebar); its fields edit the project asset directly.Vá para a página Project (02 na barra lateral); os campos dela editam o asset do projeto diretamente.
- Set
DisplayName,Company,Logo,HeroImage, andCurrencySymbol(for example $, R$, or EUR).DefinaDisplayName,Company,Logo,HeroImageeCurrencySymbol(por exemplo $, R$ ou EUR). - Choose the
Mode(Exploration or Configuration) and theTheme.Escolha oMode(Exploration ou Configuration) e oTheme. - Add your
Languages, setDefaultLanguageIndex, andbAllowLanguageSwitch. A new language also needs its culture compiled in the Localization Dashboard (Languages).Adicione osLanguages, defina oDefaultLanguageIndexe obAllowLanguageSwitch. Um idioma novo também precisa da cultura compilada no Localization Dashboard (Idiomas).
The full meaning of each field is in the Project field reference.O sentido completo de cada campo está na referência de campos de Project.
🎬images/vid-02-project-fields.mp4Screen recording: editing the BPDA_Project fieldsGravação: editando os campos do BPDA_ProjectFilling in the project's branding, currency, and languages.Preenchendo marca, moeda e idiomas do projeto. -
Create or adjust the productCriar ou ajustar o produto
A product is one thing the customer configures (a floor plan, a trim). It points at the real level to open.Um produto é uma coisa que o cliente configura (uma planta, uma versão). Ele aponta para o level real a abrir.
- Go to the Product page. Use the product that came with the template, or click New product.Vá para a página Product. Use o produto que veio com o template, ou clique em New product.
- In the details panel, set
DisplayName,Description,Thumbnail,CameraType(FPS walkthrough or Orbital), andBadgeTextif you want a "New" style badge.No painel de detalhes, definaDisplayName,Description,Thumbnail,CameraType(FPS walkthrough ou Orbital), eBadgeTextse quiser um selo tipo "New". - Set
LevelPathto your real product level. This is what re-points it away from the demo level.Defina oLevelPathpara o seu level de produto real. É isso que reaponta ele para longe do level de demonstração.
You'll see: switching product here rebuilds the Catalog and Zones pages for that product.Você verá: trocar de produto aqui reconstrói as páginas Catalog e Zones para aquele produto.
🎬images/vid-03-product.mp4Screen recording: Product page → fields + LevelPathGravação: página Product → campos + LevelPathSetting the product details and its level.Definindo os detalhes do produto e o level dele. -
Build the item catalogMontar o catálogo
The catalog is every selectable item. You can type them in or import a CSV.O catálogo é todo item selecionável. Você pode digitá-los ou importar um CSV.
- Go to the Catalog page. Use the template's table, or click New items table.Vá para a página Catalog. Use a tabela do template, ou clique em New items table.
- By hand: click Add, then fill code, display name, brand, measure, and price. Pick a thumbnail and set the Group (the dropdown lists the groups from your zones, so this fills in once you have zones).Na mão: clique em Add, depois preencha código, nome, marca, medida e preço. Escolha um thumbnail e defina o Group (o dropdown lista os grupos das suas zonas, então isso se preenche depois que você tem zonas).
- By CSV: click Open items table editor, use Import in the toolbar, then come back and press Reload.Por CSV: clique em Open items table editor, use o Import na toolbar, depois volte e aperte Reload.
- To show spec lines on the detail panel (Finish, Application, and so on), fill the item's CustomData in the Data Table (see Custom specs).Para mostrar linhas de spec no painel de detalhe (Acabamento, Aplicação, etc.), preencha o CustomData do item na Data Table (veja Specs customizadas).
The Group options come from the Zones page (step 6). If you have not built your groups yet, leave Group empty for now and fill it later, by hand or with Sync groups.As opções de Group vêm da página Zones (passo 6). Se você ainda não montou os grupos, deixe o Group vazio por enquanto e preencha depois, na mão ou com Sync groups.
Codes are uniqueCódigos são únicosEach item's code (its row name) is the key the groups use. Two items can never share a code, which is why Duplicate leaves the code blank.O código de cada item (o nome da linha) é a chave que os grupos usam. Dois itens nunca podem ter o mesmo código, por isso o Duplicate deixa o código em branco.
🎬images/vid-04-catalog.mp4Screen recording: Add a row, fill fields, pick thumbnailGravação: Add uma linha, preencher campos, escolher thumbnailAdding items to the catalog grid.Adicionando itens ao grid do catálogo. -
Create the rooms (zones)Criar os ambientes (zones)
Each zone is one room or area the customer navigates.Cada zona é um ambiente ou área que o cliente navega.
- Go to the Zones page. Type a name and click New zone. Repeat for each room.Vá para a página Zones. Digite um nome e clique em New zone. Repita para cada ambiente.
- Select the zone card, then set its icon with the icon picker (used on the rail and minimap).Selecione o card da zona, depois defina o ícone dela com o icon picker (usado no rail e no minimapa).
You'll see: a card per zone, each with a name, an icon, and a trigger chip (still empty until step 8).Você verá: um card por zona, cada um com nome, ícone e um chip de trigger (ainda vazio até o passo 8).
🎬images/vid-05-zones.mp4Screen recording: New zone + pick an iconGravação: New zone + escolher um íconeCreating a room and choosing its icon.Criando um ambiente e escolhendo o ícone. -
Build groups and add itemsMontar grupos e adicionar itens
Groups are the sets of options a room offers (flooring, wall paint), and you fill them with item codes.Grupos são os conjuntos de opções que um ambiente oferece (piso, tinta de parede), e você os preenche com códigos de item.
- With a zone selected, type a group name and click New group (this makes a root group, always shown).Com uma zona selecionada, digite um nome de grupo e clique em New group (isso cria um root group, sempre exibido).
- Pick the group in the group picker, then use Add item to add items by code. The dropdown only lists items that already exist in the catalog (step 4), so create your items there first. The Current items readout shows what is in the group.Escolha o grupo no group picker, depois use Add item para adicionar itens por código. O dropdown só lista itens que já existem no catálogo (passo 4), então crie os seus itens lá primeiro. O readout Current items mostra o que está no grupo.
- A dependent group stays hidden until an item unlocks it, through the group's
DependsOn(the unlocking item's code). Use it for options that only make sense after a prior choice.Um dependent group fica escondido até um item destravá-lo, peloDependsOndo grupo (o código do item que destrava). Use para opções que só fazem sentido depois de outra escolha.
Back on the Catalog, you can now set each item's Group; or use Sync groups to reconcile them from the zones.De volta no Catalog, agora dá para definir o Group de cada item; ou use Sync groups para reconciliar a partir das zonas.
🎬images/vid-06-groups.mp4Screen recording: New group → Add item → Current items updatesGravação: New group → Add item → Current items atualizaCreating a group and adding items to it.Criando um grupo e adicionando itens a ele. -
Link visual variants (optional)Ligar variantes visuais (opcional)
Do this for items that should change the 3D scene. Skip it for items that only need to sell and price.Faça isso para itens que devem mudar a cena 3D. Pule para itens que só precisam vender e precificar.
- Make sure the product's level has a LevelVariantSets with the sets and variants you need (see Creating a Variant Set).Garanta que o level do produto tem um LevelVariantSets com os sets e variants que você precisa (veja Criar um Variant Set).
- On the Catalog, click an item's Variant cell, pick the Set then the Variant, and press Apply. Unlink clears it.No Catalog, clique na célula Variant de um item, escolha o Set e depois o Variant, e aperte Apply. Unlink limpa.
No variant, no scene changeSem variante, sem mudança na cenaAn item with no linked variant is still selectable and priced, but choosing it changes nothing in the 3D scene.Um item sem variante atrelada ainda é selecionável e tem preço, mas escolhê-lo não muda nada na cena 3D.
🎬images/vid-07-variants.mp4Screen recording: Variant cell → Set → Variant → ApplyGravação: célula Variant → Set → Variant → ApplyLinking a catalog item to a scene variant.Ligando um item do catálogo a uma variante de cena. -
Place the zone triggersColocar os zone triggers
Every zone needs a trigger in the scene. The trigger carries the pricing multipliers, so this step is not optional.Toda zona precisa de um trigger na cena. O trigger carrega os multiplicadores de preço, então este passo não é opcional.
- On the Zones page, select a zone and click Create trigger. The card turns to "Trigger in scene".Na página Zones, selecione uma zona e clique em Create trigger. O card vira "Trigger in scene".
- Use Select in Level (or find the
BP_ZoneTriggerin the World Outliner) and move it with the transform gizmo so it sits over the room. Scale it to cover the room's floor.Use Select in Level (ou ache oBP_ZoneTriggerno World Outliner) e mova com o gizmo de transformação para ele ficar sobre o ambiente. Escale para cobrir o piso do ambiente. - Repeat for every zone.Repita para cada zona.
🎬images/vid-08-triggers.mp4Screen recording: Create trigger → Select in Level → move over the roomGravação: Create trigger → Select in Level → mover sobre o ambienteCreating and positioning a zone trigger.Criando e posicionando um zone trigger. -
Set the multipliersDefinir os multiplicadores
The multiplier turns a unit price into a room total. Set one per group, per room.O multiplicador transforma um preço unitário num total por ambiente. Defina um por grupo, por ambiente.
- Go to the Multipliers page. Each zone with a trigger shows a card with one row per root group.Vá para a página Multipliers. Cada zona com trigger mostra um card com uma linha por root group.
- Type the value: the floor area for items priced per m², or the count for items priced per unit. A group left at zero prices its items free.Digite o valor: a área do piso para itens por m², ou a quantidade para itens por unidade. Um grupo deixado em zero precifica os itens de graça.
These values stay in memory until you Save (step 11).Esses valores ficam em memória até você Salvar (passo 11).
🎬images/vid-09-multipliers.mp4Screen recording: typing a multiplier on a zone cardGravação: digitando um multiplicador num card de zonaSetting a group's multiplier for a room.Definindo o multiplicador de um grupo para um ambiente. -
ValidateValidar
Validation catches the mistakes that make the runtime misbehave.A validação pega os erros que fazem o runtime se comportar mal.
- Go to the Validation page and run the check. Read the report top to bottom.Vá para a página Validation e rode a checagem. Leia o relatório de cima a baixo.
- Fix each issue (a missing group, a group with no multiplier, a zone with no trigger, a bad variant pair), then run again until the count hits zero and the Validated badge appears.Corrija cada problema (um grupo faltando, um grupo sem multiplicador, uma zona sem trigger, um par de variante ruim), depois rode de novo até a contagem zerar e o selo Validated aparecer.
See the full check list under the Validation page.Veja a lista completa de checagens em página Validation.
🎬images/vid-10-validate.mp4Screen recording: run → fix an issue → 0 issues → ValidatedGravação: rodar → corrigir → 0 problemas → ValidatedRunning validation until it is clean.Rodando a validação até ficar limpa. -
SaveSalvar
Save is the commit. It writes the level (trigger multipliers) and the item table to disk.O Save é o commit. Ele grava o level (multiplicadores dos triggers) e a tabela de itens no disco.
- Press Save in the sidebar. Do this before closing the tool or pressing Play, or your catalog and multiplier edits are lost.Aperte Save na barra lateral. Faça isso antes de fechar a ferramenta ou apertar Play, ou suas edições de catálogo e multiplicador se perdem.
🎬images/vid-11-save.mp4Screen recording: pressing Save in the sidebarGravação: apertando Save na barra lateralCommitting everything with Save.Gravando tudo com o Save. -
Test in PlayTestar em Play
Run the configurator and confirm your setup end to end.Rode o configurador e confirme o seu setup de ponta a ponta.
- Press Play. Walk (or orbit) through the rooms and check: the zones appear on the rail and minimap, the groups show the right items, prices and thumbnails resolve, and a linked item swaps the scene.Aperte Play. Ande (ou orbite) pelos ambientes e confira: as zonas aparecem no rail e no minimapa, os grupos mostram os itens certos, preços e thumbnails resolvem, e um item com variante troca a cena.
- On a brand-new project, if Play shows the demo apartment, it is the fallback — set your project up under Configuring a new project. The two videos below show both modes: Configuration (login and pricing) and Exploration (product selector, no prices).Num projeto novo, se o Play mostra o apartamento demo, é o fallback — configure o seu projeto em Configurando um projeto novo. Os dois vídeos abaixo mostram os dois modos: Configuration (login e preço) e Exploration (seletor de produto, sem preços).
- If something is off (a free item, an empty room), go back to Validate: it usually points straight at the cause.Se algo estiver errado (um item de graça, um ambiente vazio), volte para Validar: ela geralmente aponta direto para a causa.
🎬images/vid-12-test-configuration.mp4Configuration mode: login → navigate → pick items → price updatesModo Configuration: login → navegar → escolher itens → preço atualizaTesting in Configuration mode (with login and pricing).Testando no modo Configuration (com login e preço). 🎬images/vid-12-test-exploration.mp4Exploration mode: product selector, no login, no pricesModo Exploration: seletor de produto, sem login, sem preçosTesting in Exploration mode (product selector, no prices).Testando no modo Exploration (seletor de produto, sem preços).
Configuring a new project (what the configurator loads)Configurando um projeto novo (o que o configurador carrega)
The template ships pointing at the demo. On a brand-new project there is one setup that trips everyone up: telling the runtime which project to load. Do it once. O template já vem apontando para a demo. Num projeto novo há um ajuste que pega todo mundo: dizer ao runtime qual projeto carregar. Faça isso uma vez.
Why a new level shows the demo apartmentPor que um nível novo mostra o apartamento demo
When you enter a product level, the game mode uses the product the client logged into. If no one logged in — for example when you press Play directly on a product level in the editor — it falls back to the StartupProject set on the Game Instance, and uses that project's first product. In the template, StartupProject points at the demo project, so a brand-new (even empty) level comes up with the demo apartment's rooms, groups, and items. That is the fallback doing its job, not a bug in your level.
Ao entrar num nível de produto, o game mode usa o produto em que o cliente fez login. Se ninguém logou — por exemplo, quando você dá Play direto num nível de produto no editor — ele cai no StartupProject definido na Game Instance, e usa o primeiro produto daquele projeto. No template, o StartupProject aponta para o projeto demo, então um nível novo (mesmo vazio) aparece com os cômodos, grupos e itens do apartamento demo. É o fallback fazendo o trabalho dele, não um bug do seu nível.
Set it up for your projectConfigure para o seu projeto
-
Point StartupProject at your projectAponte o StartupProject para o seu projeto
Open
BPS_ConfiguratorGameInstance— the class listed under Project Settings → Maps & Modes → Game Instance Class — and in its Class Defaults setStartupProjectto yourBPDA_Project. This is the boot and fallback project.Abra oBPS_ConfiguratorGameInstance— a classe que está em Project Settings → Maps & Modes → Game Instance Class — e nos Class Defaults dele defina oStartupProjectpara o seuBPDA_Project. Esse é o projeto de boot e de fallback.Set it on the child, not the parentDefina na filha, não na paiStartupProjectis declared on the parent classBP_GameInstance, but the game instantiates the child,BPS_ConfiguratorGameInstance. The child inherits the parent's value until it has its own, so the value that actually wins is the child's. Set it onBPS_ConfiguratorGameInstance, and do not put different values on the parent and the child at the same time — the child's would win and the parent's would look like it "did not take".OStartupProjecté declarado na classe paiBP_GameInstance, mas o jogo instancia a filha,BPS_ConfiguratorGameInstance. A filha herda o valor da pai enquanto não tiver o próprio, então o valor que manda de verdade é o da filha. Defina noBPS_ConfiguratorGameInstance, e não coloque valores diferentes na pai e na filha ao mesmo tempo — o da filha ganharia e o da pai pareceria que "não pegou". -
Set the Game Default Map to L_EntryDeixe o Game Default Map como L_Entry
In Project Settings → Maps & Modes, set Game Default Map to
L_Entry, so Play starts at the login (the intended flow). If it points at the demo scene, Play always opens the demo, no matter which level you have open — only Play This Level in the viewport opens the open level.Em Project Settings → Maps & Modes, defina o Game Default Map comoL_Entry, para o Play começar no login (o fluxo pretendido). Se ele apontar para a cena demo, o Play sempre abre a demo, não importa qual nível você tenha aberto — só o Play This Level na viewport abre o nível aberto. -
Check each product's levelConfira o nível de cada produto
On each product, make sure
LevelPath(Scene) points at that product's real level.Em cada produto, garanta que oLevelPath(Scene) aponta para o nível real daquele produto.
The end customer starts at L_Entry, logs in, and the client's product decides what loads — the fallback never runs. Pressing Play directly on a product level is a dev shortcut that depends on StartupProject being right.O cliente final começa no L_Entry, faz login, e o produto do cliente define o que carrega — o fallback nem entra. Dar Play direto num nível de produto é um atalho de dev que depende do StartupProject estar certo.
Today StartupProject is set by hand. A future update is planned to remove this (each level would declare its own product), so this step may change in later versions.Hoje o StartupProject é setado na mão. Está prevista uma atualização futura para remover isso (cada nível declararia o próprio produto), então esse passo pode mudar em versões futuras.
Advanced & manual setupSetup avançado e manual
The setup tool covers the common path. This section is for what it does not cover yet: filling the item table by column, building dependent groups in the zone asset, the zone trigger's parts, the login table, and doing the whole thing without the tool. A ferramenta de setup cobre o caminho comum. Esta seção é para o que ela ainda não cobre: preencher a tabela de itens por coluna, montar grupos dependentes no asset da zona, as partes do zone trigger, a tabela de login, e fazer tudo sem a ferramenta.
Filling DT_Items (column by column)Preencher o DT_Items (coluna a coluna)
The catalog lives in the DT_Items DataTable. Most columns are editable in the Catalog grid; a few are set here (Open items table editor → Row Editor). Here is every column and how to fill it.
O catálogo mora na DataTable DT_Items. A maioria das colunas é editável no grid do Catalog; algumas se preenchem aqui (Open items table editor → Row Editor). Aqui está cada coluna e como preencher.
| ColumnColuna | How to fill itComo preencher |
|---|---|
| Row NameRow Name (codecódigo) | Unique row id, no spaces or dots. It is the key the group's DependsOn points to. Ex.: Sofa_Casena, Floor_Living_OakNatural.Id único da linha, sem espaço ou ponto. É a chave que o DependsOn do grupo aponta. Ex.: Sofa_Casena, Floor_Living_OakNatural. |
DisplayName | The name shown on the card. Free text, accents and spaces allowed.O nome que aparece no card. Texto livre, com acento e espaço. |
Brand | Brand (free text).Marca (texto livre). |
Description | The detail panel text (editable in the Catalog grid or here).O texto do painel de detalhe (editável no grid do Catalog ou aqui). |
Price | Pure number (e.g. 62.0). The currency symbol comes from the Project.Número puro (ex. 62.0). O símbolo de moeda vem do Project. |
MeasureType | Enum — use exactly SquareMeter, LinearMeter, or Unit.Enum — use exatamente SquareMeter, LinearMeter ou Unit. |
Thumbnail | Object path in the form /Game/.../T_Name.T_Name (the asset name repeats after the dot). Empty = card with no image. The in-grid picker is a coming release.Caminho do objeto no formato /Game/.../T_Name.T_Name (o nome do asset repete depois do ponto). Vazio = card sem imagem. O picker no grid é um release futuro. |
VariantSetName + VariantName | ⚠️ Must match the Variant Set and Variant name in the scene's LVS exactly — the runtime does GetVariantSetByName + SwitchOnVariantByName. A mismatch applies nothing.⚠️ Têm que bater exatamente com o nome do Variant Set e da Variant no LVS da cena — o runtime faz GetVariantSetByName + SwitchOnVariantByName. Se não bater, não aplica nada. |
CustomData | Structured key → value pairs (Dimension, Application, Finish, Collection…). Not editable in the tool; see Custom specs.Pares chave → valor estruturados (Dimensão, Aplicação, Acabamento, Coleção…). Não editável na ferramenta; veja Specs customizadas. |
Group | The GroupId the item belongs to (must exist in the zone's RootGroups or DependentGroups). Usually filled for you; Sync groups reconciles both sides.O GroupId a que o item pertence (tem que existir no RootGroups ou DependentGroups da zona). Normalmente preenchido pra você; o Sync groups reconcilia os dois lados. |
An item's VariantSetName and VariantName must be identical to the Variant Set and Variant names in the scene's LevelVariantSets. The runtime resolves them by name, so a single typo means the swap silently does nothing.O VariantSetName e o VariantName de um item têm que ser idênticos aos nomes do Variant Set e da Variant no LevelVariantSets da cena. O runtime resolve por nome, então um único erro de digitação faz a troca não fazer nada, sem avisar.
Root vs dependent groups: where each is createdGrupos root x dependentes: onde criar cada um
A group is Root (always visible in the menu) or Dependent (appears only when a specific item is chosen). Each one is created in a different place. Um grupo é Root (sempre visível no menu) ou Dependente (aparece só quando um item específico é escolhido). Cada um se cria num lugar.
- Root groups and their items — in the EUW Zones tab: use New group to create them (e.g. Sofa, Floor, Cabinet) and the group selector to add items. New group makes only root groups.Grupos root e seus itens — na aba Zones do EUW: use New group para criar (ex. Sofa, Floor, Cabinet) e o seletor de grupo para adicionar os itens. O New group cria apenas grupos root.
- Dependent groups — directly in the zone asset (
DA_Zone), in theDependentGroupsarray (Content Browser, or open the zone from the Product tab). For each one fillGroupId,DependsOn(the code / RowName of the item that unlocks the group), andItemRows(the codes of the items inside it). The tool does not create dependent groups nor editDependsOnyet.Grupos dependentes — direto no asset da zona (DA_Zone), no arrayDependentGroups(Content Browser, ou abra a zona pela aba Product). Para cada um preenchaGroupId,DependsOn(o código / RowName do item que destrava o grupo) eItemRows(os códigos dos itens dentro dele). A ferramenta ainda não cria grupo dependente nem edita oDependsOn.
Example: a sofa, model → finishExemplo: um sofá, modelo → acabamento
The customer picks a sofa model, then only that model's finishes appear. O cliente escolhe um modelo de sofá, e aí só os acabamentos daquele modelo aparecem.
# In the EUW (root group)# No EUW (grupo root)
Root group "Sofa"  → ItemRows: Sofa_Casena, Sofa_Otto   # the models# os modelos

# In DA_Zone → DependentGroups (Content Browser)# No DA_Zone → DependentGroups (Content Browser)
"CasenaFinish"  DependsOn: Sofa_Casena  ItemRows: Sofa_Casena_ChalkWeave, ...Indigo, ...Ivory
"OttoFinish"    DependsOn: Sofa_Otto    ItemRows: Sofa_Otto_...
At runtime, choosing the Casena model makes the configurator look through DependentGroups for a group whose DependsOn is the chosen item's code, and it shows CasenaFinish. Pick a finish and the material swaps.
Em runtime, escolher o modelo Casena faz o configurador procurar nos DependentGroups um grupo cujo DependsOn seja o código do item escolhido, e mostra o CasenaFinish. Escolhe um acabamento e o material troca.
The Variant Manager (LVS) dependency makes the finish variant apply over the right model in the scene. The group's DependsOn makes the option group appear in the UI. They are set in different places and work together.A dependência do Variant Manager (LVS) faz a variante de acabamento aplicar sobre o modelo certo na cena. O DependsOn do grupo faz o grupo de opções aparecer na UI. São configurados em lugares diferentes e trabalham juntos.
After filling the dependent groups' ItemRows in DA_Zone, press Sync groups on the Catalog to write the correct Group column on those items (Sync sweeps root and dependent). Dependent groups also need a multiplier in the zone trigger — see the note under Multipliers.
Depois de preencher os ItemRows dos grupos dependentes no DA_Zone, aperte Sync groups no Catalog para escrever a coluna Group correta nesses itens (o Sync varre root e dependentes). Grupos dependentes também precisam de um multiplicador no zone trigger — veja a nota na página Multipliers.
Zone trigger anatomyAnatomia do zone trigger
The BP_ZoneTrigger in the level (one per zone) does more than carry the multipliers. Its parts:
O BP_ZoneTrigger no level (um por zona) faz mais do que carregar os multiplicadores. As partes dele:
- ZoneRef — the zone data asset this trigger represents. Set it per instance in the level.o data asset da zona que esse trigger representa. Setado por instância no level.
- Multipliers — the per-group area / quantity map used for pricing (see the pricing model).o mapa de área / quantidade por grupo usado no preço (veja o modelo de preço).
- Trigger boxTrigger box — the overlap volume that detects the player entering the room. For a zone whose detection is Trigger overlap, this is what activates it. Size it to cover the room's floor.o volume de overlap que detecta o jogador entrando no ambiente. Para uma zona cuja detecção é Trigger overlap, é isso que a ativa. Dimensione para cobrir o piso do ambiente.
- Map label anchorMap label anchor — the point that places this room's name on the minimap. Move it to where the label should sit on the floor plan.o ponto que posiciona o nome deste ambiente no minimapa. Mova-o para onde o rótulo deve ficar na planta.
- Teleport targetTeleport target — an arrow you place inside the room. When the customer jumps to this zone, the player is teleported to the arrow's position and facing its direction, so set both to a good vantage point.uma seta que você coloca dentro do ambiente. Quando o cliente pula para esta zona, o jogador é teleportado para a posição da seta e olhando na direção dela, então ajuste posição e direção para um bom ângulo.
The client table (login)A tabela de clientes (login)
The login checks the customer's access code against a client table, DT_Clients. Each row is one client. On a match it loads that client's data.
O login confere o código de acesso do cliente contra uma tabela de clientes, o DT_Clients. Cada linha é um cliente. Ao casar, ele carrega os dados daquele cliente.
Login is by access code only — the customer never types an email. Each row (the S_ClientData struct) has these columns:
O login é só por código de acesso — o cliente nunca digita e-mail. Cada linha (a struct S_ClientData) tem estas colunas:
| ColumnColuna | What it doesO que faz |
|---|---|
Name | The client's name; it becomes the save slot for their session and the client in the order JSON.O nome do cliente; vira o slot de save da sessão e o client no JSON do pedido. |
OrderId | A pre-assigned order id, used on the summary and as the key for the saved order and session.Um id de pedido pré-atribuído, usado no resumo e como chave do pedido e da sessão salvos. |
Password | The access code, checked against what the customer types. Plain text, demo-grade — swap for real auth in production.O código de acesso, conferido contra o que o cliente digita. Texto plano, nível demo — troque por autenticação real em produção. |
Product | The product loaded for that client on login.O produto carregado para aquele cliente no login. |
Email | The client's email. Read from the row (no email field on screen) and carried into the order JSON (see Order data).O e-mail do cliente. Lido da linha (sem campo de e-mail na tela) e levado para o JSON do pedido (veja Dados do pedido). |
To fill it: open DT_Clients, add a row per client, and set the fields. To choose which table the runtime uses, set it in the Clients field on the Project page (it lives on the project asset).
Para preencher: abra o DT_Clients, adicione uma linha por cliente, e preencha os campos. Para escolher qual tabela o runtime usa, defina-a no campo Clients da página Project (ele fica no asset do projeto).
A project used in Configuration mode (the flow that starts with the client login) needs a Client Table with at least one client. The login reads the table, finds the client by code, and loads their product. With no clients in the table, the login finds nobody and there is no way into the configurator.Um projeto usado no modo Configuration (o fluxo que começa com o login do cliente) precisa de uma Client Table com pelo menos um cliente. O login lê a tabela, acha o cliente pelo código e carrega o produto dele. Sem nenhum cliente na tabela, o login não encontra ninguém e não há como entrar no configurador.
Doing it without the setup toolFazendo sem a ferramenta de setup
The tool is a convenience; every asset it writes can be edited directly. If you prefer working in the Content Browser, or need a field the tool does not cover, this is the same setup by hand: A ferramenta é uma conveniência; todo asset que ela escreve pode ser editado direto. Se você prefere trabalhar no Content Browser, ou precisa de um campo que a ferramenta não cobre, este é o mesmo setup na mão:
- Project — open or duplicate a
BPDA_Projectand fill its fields (see Project fields).Project — abra ou duplique umBPDA_Projecte preencha os campos (veja Campos de Project). - Product — open or duplicate a
BPDA_Product; set its fields and itsItemsTable.Product — abra ou duplique umBPDA_Product; defina os campos e oItemsTable. - Items — edit
DT_Itemsdirectly (see Filling DT_Items).Itens — edite oDT_Itemsdireto (veja Preencher o DT_Items). - Zones — open or duplicate a
BPDA_Zone; fillRootGroupsandDependentGroups(GroupId, DisplayName, Icon, ItemRows, and DependsOn on the dependent ones).Zones — abra ou duplique umBPDA_Zone; preenchaRootGroupseDependentGroups(GroupId, DisplayName, Icon, ItemRows, e o DependsOn nos dependentes). - Triggers — place a
BP_ZoneTriggerper zone; setZoneRefand theMultipliersmap, and position the trigger box, map label anchor, and teleport target (see Zone trigger anatomy).Triggers — coloque umBP_ZoneTriggerpor zona; defina oZoneRefe o mapaMultipliers, e posicione o trigger box, o map label anchor e o teleport target (veja Anatomia do zone trigger). - Login — fill
DT_Clientsand set it on the Game Instance (see Client table).Login — preencha oDT_Clientse aponte na Game Instance (veja Tabela de clientes). - Maps & settings — see Migrating to your project.Mapas e settings — veja Migrar para o seu projeto.
Keep names consistent (ZoneId, GroupId, item codes): everything references by name, so a rename in one place must be matched in the others. Mantenha os nomes consistentes (ZoneId, GroupId, códigos de item): tudo referencia por nome, então um rename num lugar tem que ser espelhado nos outros.
Current tool limitationsLimitações atuais da ferramenta
The setup tool does not yet cover: editing an item's CustomData; creating or editing dependent groups and their DependsOn; and removing a single item from a group (the card only adds — remove via the zone's ItemRows or by recreating the group). Everything else — projects, products, zones, root groups, item rows (including Thumbnail, Description, and MeasureType), group assignment, variant linking, multipliers, validation, and save — is in the tool.A ferramenta ainda não cobre: editar o CustomData de um item; criar ou editar grupos dependentes e o DependsOn deles; e remover um item específico de um grupo (o card só adiciona — remova pelos ItemRows da zona ou recriando o grupo). Todo o resto — projetos, produtos, zonas, grupos root, linhas de item (inclusive Thumbnail, Description e MeasureType), atribuição de grupo, ligação de variante, multiplicadores, validação e save — está na ferramenta.
Migrating to your projectMigrar para o seu projeto
Most people just use Create Project from the template and drop their assets inside — then you can skip this page. Read on only if you want to bring the template's content into a project you already have. A maioria só usa Create Project a partir do template e coloca os assets dentro — aí você pode pular esta página. Continue só se quiser trazer o conteúdo do template para um projeto que você já tem.
-
Enable the pluginsHabilitar os plugins
In your project, open Edit → Plugins and enable Variant Manager (the configurator needs it for visual swaps), then restart the editor. If you also import archviz scenes, enable the Datasmith / Interchange tools too. See Requirements & plugins.No seu projeto, abra Edit → Plugins e habilite o Variant Manager (o configurador precisa dele para as trocas visuais), depois reinicie o editor. Se você também importa cenas de archviz, habilite as ferramentas Datasmith / Interchange também. Veja Requisitos e plugins.
-
Migrate the contentMigrar o conteúdo
Open the template project, right-click the template's top content folder in the Content Browser, and choose Migrate. Point it at your project's
Contentfolder. Unreal copies the assets and everything they depend on.Abra o projeto do template, clique com o botão direito na pasta de conteúdo raiz do template no Content Browser, e escolha Migrate. Aponte para a pastaContentdo seu projeto. A Unreal copia os assets e tudo de que eles dependem. -
Set the Game InstanceDefinir a Game Instance
In Project Settings → Maps & Modes, set Game Instance Class to
BPS_ConfiguratorGameInstance. This holds the shared runtime state and the login client-table default, so the runtime does not work without it.Em Project Settings → Maps & Modes, defina o Game Instance Class paraBPS_ConfiguratorGameInstance. É o que guarda o estado compartilhado do runtime e o default da tabela de clientes do login, então o runtime não funciona sem ele. -
Set the maps and game modesDefinir os mapas e game modes
In the same Maps & Modes section, set the Editor Startup Map and Game Default Map to
L_Entry. Its game mode should beBP_EntryGameMode. On each product level, set the GameMode Override in World Settings toBP_ConfiguratorGameMode(which usesBP_HUD). See Entry level, game modes, and game instance.Na mesma seção Maps & Modes, defina o Editor Startup Map e o Game Default Map para oL_Entry. O game mode dele deve ser oBP_EntryGameMode. Em cada level de produto, defina o GameMode Override em World Settings para oBP_ConfiguratorGameMode(que usa oBP_HUD). Veja Level inicial, game modes e game instance. -
Check the login client tableConferir a tabela de clientes do login
Confirm the client table (
DT_Clients) is still set as the default on the Game Instance, so login works. Edit that table to set your own access codes.Confirme que a tabela de clientes (DT_Clients) continua definida como default na Game Instance, para o login funcionar. Edite essa tabela para definir os seus próprios códigos de acesso. -
Keep projects in the scanned folderManter os projetos na pasta escaneada
The setup tool's Home page only lists projects from a fixed folder. Keep your
BPDA_Projectassets there (or press Sync after moving them) so the tool finds them.A página Home da ferramenta só lista projetos de uma pasta fixa. Mantenha os seus assetsBPDA_Projectali (ou aperte Sync depois de movê-los) para a ferramenta achá-los.
Input mappings and any other default classes should be matched to what the sample project uses (open the sample's Project Settings and World Settings and mirror them). No Lumen or lighting setup is needed: the template runs under any lighting.Os input mappings e quaisquer outras classes default devem ser espelhados do que o projeto de exemplo usa (abra o Project Settings e o World Settings do exemplo e copie). Nenhum setup de Lumen ou iluminação é necessário: o template roda sob qualquer iluminação.
The runtimeO runtime
The runtime is the playable configurator your customer uses. It reads the same data you set up, so it needs no separate configuration. This is the flow it follows. O runtime é o configurador jogável que o seu cliente usa. Ele lê os mesmos dados que você configurou, então não precisa de configuração à parte. Este é o fluxo que ele segue.
Splash → login → product selection → scene → room navigation → item choice per group → price → summary → order.Splash → login → seleção de produto → cena → navegação por ambientes → escolha de item por grupo → preço → resumo → pedido.
Entry level, game modes, and game instanceLevel inicial, game modes e game instance
The game boots into the entry level, L_Entry. Its game mode, BP_EntryGameMode, reads the project's Mode and spawns the matching widgets at startup, so this is where the splash, login, and product selection live. Choosing a product opens that product's level through its LevelPath.
O jogo inicia no level de entrada, o L_Entry. O game mode dele, o BP_EntryGameMode, lê o Mode do projeto e cria as widgets certas na inicialização, então é aqui que ficam o splash, o login e a seleção de produto. Escolher um produto abre o level dele pelo LevelPath.
Inside a product level the game mode is BP_ConfiguratorGameMode, which runs the main HUD through BP_HUD (it spawns the on-screen HUD and uses the splash as a loading curtain until the scene settles). The Game Instance is the same across every map: BPS_ConfiguratorGameInstance, which holds the shared state (current project and product, selections, budget, summary, order).
Dentro de um level de produto, o game mode é o BP_ConfiguratorGameMode, que comanda o HUD principal pelo BP_HUD (cria o HUD na tela e usa o splash como cortina de carregamento até a cena assentar). A Game Instance é a mesma em todos os mapas: o BPS_ConfiguratorGameInstance, que guarda o estado compartilhado (projeto e produto atuais, seleções, orçamento, resumo, pedido).
| Runs inRoda em | ClassClasse | JobFunção |
|---|---|---|
| Entry levelLevel de entrada (L_Entry) | BP_EntryGameMode | Reads the project Mode and spawns the startup widgets (splash, login, product menu).Lê o Mode do projeto e cria as widgets de inicialização (splash, login, menu de produto). |
| Product levelsLevels de produto | BP_ConfiguratorGameMode (+ BP_HUD) | Runs the in-scene main HUD during configuration.Comanda o HUD principal na cena durante a configuração. |
| Every mapTodos os mapas | BPS_ConfiguratorGameInstance | The Game Instance holding the shared state across the session.A Game Instance que guarda o estado compartilhado durante a sessão. |
Exploration vs ConfigurationExploration x Configuration
The project's Mode decides how the entry screen works. Set it before you deploy.
O Mode do projeto decide como a tela de entrada funciona. Defina antes do deploy.
- Configuration — the entry opens the client login. The project needs a client table with at least one client, each pointing to a product; the client logs in and their product loads, with live pricing, summary, and order. This is the per-client sales flow.a entrada abre o login de cliente. O projeto precisa de uma client table com pelo menos um cliente, cada um apontando para um produto; o cliente loga e o produto dele carrega, com preço ao vivo, resumo e pedido. É o fluxo de vendas por cliente.
- Exploration — the entry opens a product selector, with no login and no client table, and prices are not shown. Good for a public showroom or a sales stand where the price is not needed or not wanted. The customer picks a product and explores it.a entrada abre um seletor de produtos, sem login e sem client table, e os preços não aparecem. Bom para showroom público ou stand de vendas onde o preço não é necessário ou não é desejado. O cliente escolhe um produto e explora.
Exploration mode (the project field above) is not the same as the Explore button or Cinema mode, which exist in both modes: the Explore button sits with the room icons and toggles the minimap on and off even while you are inside a room; Cinema mode (top-right corner) hides the interface for a clean view.O modo Exploration (o campo do projeto acima) não é a mesma coisa que o botão Explore nem o modo Cinema, que existem nos dois modos: o botão Explore fica junto dos ícones de ambiente e liga/desliga o minimapa mesmo dentro de um ambiente; o modo Cinema (canto superior direito) esconde a interface para uma vista limpa.
Splash and loginSplash e login
The splash uses the project's hero image and display name. The login validates against the project's client table (DT_Clients, set on the Project page), which needs at least one client or there is no way in (see Client table). It is a demo gate, meant to be swapped for your own auth if you need one.O splash usa a hero image e o display name do projeto. O login valida contra a tabela de clientes do projeto (DT_Clients, definida na página Project), que precisa de pelo menos um cliente ou não há como entrar (veja Tabela de clientes). É uma trava de demonstração, pensada para ser trocada pela sua própria autenticação se você precisar.
Product selectionSeleção de produto
Product cards show the thumbnail, display name, description, and optional badge. Choosing one opens the product's level with the product's camera (FPS walkthrough or orbital).Os cards de produto mostram o thumbnail, o display name, a descrição e o selo opcional. Escolher um abre o level do produto com a câmera do produto (FPS walkthrough ou orbital).
Room navigation and item choiceNavegação e escolha de itens
Zones activate by trigger overlap or manually, depending on the zone's detection type. The rail and minimap show the rooms by name and icon. In each room, the root groups always appear; dependent groups appear once an item unlocks them. The customer picks items from the groups.As zonas ativam por overlap de trigger ou manualmente, conforme o detection type da zona. O rail e o minimapa mostram os ambientes por nome e ícone. Em cada ambiente, os root groups sempre aparecem; os dependent groups aparecem depois que um item os destrava. O cliente escolhe os itens dos grupos.
Price, summary, and orderPreço, resumo e pedido
Each item's price is multiplied by its group's multiplier in that room, and the currency symbol comes from the project. A running total follows the session. The summary screen builds the lines per room; confirming the order saves a local record and prepares a JSON payload — see Order data & export.O preço de cada item é multiplicado pelo multiplicador do grupo dele naquele ambiente, e o símbolo de moeda vem do projeto. Um total corrente acompanha a sessão. A tela de resumo monta as linhas por ambiente; confirmar o pedido grava um registro local e prepara um payload JSON — veja Dados do pedido e export.
Language and themeIdioma e tema
If the project allows a language switch, the selector shows up in the pause settings; the starting language is the project default. The pause settings also hold a Light / Dark theme switch, and the whole look comes from the UI theme (see Themes). The project's mode is covered above under Exploration vs Configuration.Se o projeto permite troca de idioma, o seletor aparece nas settings da pausa; o idioma inicial é o default do projeto. As settings da pausa também trazem uma troca de tema Light / Dark, e todo o visual vem do tema de UI (veja Temas). O mode do projeto está coberto acima em Exploration x Configuration.
The main UI panelsOs painéis principais da UI
Behind the screens sits the Game Instance (BPS_ConfiguratorGameInstance) that holds the current project and product, the selection per zone, the budget per zone, the grouped summary, and the order. The panels do not talk to each other; they read from it and react to its events. That is why the rail, the status pill, the cards, and the detail panel all stay in sync the moment an option is applied.Por trás das telas está a Game Instance (BPS_ConfiguratorGameInstance) que guarda o projeto e o produto atuais, a seleção por zona, o orçamento por zona, o resumo agrupado e o pedido. Os painéis não conversam entre si; eles leem dela e reagem aos eventos dela. É por isso que o rail, a status pill, as cartas e o painel de detalhe se mantêm em sincronia no instante em que uma opção é aplicada.
The runtime screens, in the order the customer meets them: As telas do runtime, na ordem em que o cliente as encontra:
- Splash (WBP_Splash) — a brand curtain with a progress bar, also used as the loading cover while a product level materializes. It steps aside when its animation finishes.uma cortina de marca com barra de progresso, usada também como cobertura de carregamento enquanto o level do produto materializa. Ela sai quando a animação termina.
- Login (WBP_Login) — shows the active project (hero, company, name). The customer types an access code, matched against the client table; on success it loads the client's name (the save slot), their product, and a pre-assigned order id used later on the summary. The demo password is plain text.mostra o projeto ativo (hero, empresa, nome). O cliente digita um código de acesso, casado contra a tabela de clientes; no sucesso carrega o nome do cliente (o slot de save), o produto dele e um id de pedido pré-atribuído, usado depois no resumo. A senha de demonstração é texto plano.
- Product cardCard de produto (WBP_ProductCard) — one card in the start menu per product, with thumbnail, name, description, a badge (hidden when empty), and a room icon per zone. Selecting it loads the product and opens its level.um card no menu inicial por produto, com thumbnail, nome, descrição, um selo (escondido quando vazio) e um ícone de cômodo por zona. Selecionar carrega o produto e abre o level dele.
- Main HUDHUD principal (WBP_MainHUD) — the overlay that stays on screen during the experience. It shows and hides the sub-panels by state (navigating, in a zone, editing), keeps the rail, category bar, options panel, and detail panel in step, and toggles the minimap. The zone status pill shows how many groups you have chosen in the active zone (for example "3 of 5"). It also drives cinema mode, which hides the chrome for a clean view.o overlay que fica na tela durante a experiência. Ele mostra e esconde os sub-painéis conforme o estado (navegando, numa zona, editando), mantém o rail, a barra de categorias, o painel de opções e o painel de detalhe alinhados, e liga/desliga o minimapa. A status pill da zona mostra quantos grupos você escolheu na zona ativa (por exemplo "3 de 5"). Também comanda o modo cinema, que esconde a interface para uma vista limpa.
- Zone railRail de zonas (WBP_ZoneRail) — the side list of rooms. Collapsed it shows only the icons; on hover it expands to show the zone names, and a pin button keeps it open. The active zone is tinted (the shade comes from the theme). A "done" badge appears over a zone once every group in it has a chosen item. Because the collapsed rail is narrow, keep zone names short so they don't clip.a lista lateral de ambientes. Recolhida mostra só os ícones; no hover ela expande e mostra os nomes das zonas, e um botão de pin a mantém aberta. A zona ativa fica com um tom diferente (a cor vem do tema). Um badge de "done" aparece sobre a zona quando todo grupo dela tem um item escolhido. Como o rail recolhido é estreito, use nomes de zona curtos para não cortar.
- Category barBarra de categorias (WBP_CategoryBar) — the tabs for the current zone's groups, one tab per group, kept in sync with the active group.as abas dos grupos da zona atual, uma aba por grupo, em sincronia com o grupo ativo.
- Options panelPainel de opções (WBP_OptionsPanel) — lists the items of the active group as cards, with a search box when there is more than one. It pre-selects the card matching the zone's current choice and re-reads the selection after an undo or a restore, so it always shows the right item. It asks the HUD to open the detail panel rather than opening it itself.lista os itens do grupo ativo como cartas, com uma busca quando há mais de um. Pré-seleciona a carta que casa com a escolha atual da zona e relê a seleção após um undo ou um restore, então sempre mostra o item certo. Ele pede ao HUD para abrir o painel de detalhe, em vez de abrir sozinho.
- Item cardCarta de item (WBP_ItemCard) — one option in the list: name, brand, thumbnail, and price (unit price plus price × quantity, with a per-unit suffix from the measure). Clicking it applies the item; the info button opens the detail panel instead. Idle / hover / selected states come from the theme. Cards have a fixed width and the name shrinks to fit, so keep item names short and leave longer text for the detail panel.uma opção na lista: nome, marca, thumbnail e preço (preço unitário mais preço × quantidade, com sufixo por unidade vindo da medida). Clicar aplica o item; o botão de info abre o painel de detalhe em vez de aplicar. Os estados idle / hover / selected vêm do tema. Os cards têm largura fixa e o nome encolhe para caber, então use nomes de item curtos e deixe o texto mais longo para o painel de detalhe.
- Detail panelPainel de detalhe (WBP_DetailPanel) — the full sheet for one option: hero image, name, brand, description, a spec line per custom attribute (from the item's CustomData), base price and quantity, and the computed total. Its button reads "Apply" when the option is not the active one, and "Applied" (disabled) when it is.a ficha completa de uma opção: imagem hero, nome, marca, descrição, uma linha de spec por atributo custom (do CustomData do item), preço-base e quantidade, e o total calculado. O botão mostra "Apply" quando a opção não é a ativa, e "Applied" (desabilitado) quando é.
- Budget popoverPopover de orçamento (WBP_BudgetPopover) — the per-zone breakdown: one line per zone from the budget map, plus the overall total. "View Summary" opens the full summary.o detalhamento por zona: uma linha por zona a partir do mapa de orçamento, mais o total geral. "View Summary" abre o resumo completo.
- Summary screenTela de resumo (WBP_SummaryScreen) — the final review, one block per room with the product name, total, and counts. Confirming generates the order (using the order payload and the order id from login).a revisão final, um bloco por cômodo com o nome do produto, o total e as contagens. Confirmar gera o pedido (usando o order payload e o id de pedido do login).
- Pause (WBP_Pause) — a paused overlay with pages (menu, settings, controls, and reset / exit guards). Settings hold the language switch (hidden when the project disallows it) and the Light / Dark theme switch.um overlay de pausa com páginas (menu, settings, controles, e guardas de reset / saída). As settings trazem a troca de idioma (escondida quando o projeto não permite) e a troca de tema Light / Dark.
- Resume dialogDiálogo de retomar (WBP_ResumeDialog) — on return, offers Continue (keep the save) or Start Over (delete it).ao voltar, oferece Continue (mantém o save) ou Start Over (apaga).
Annotated screensTelas anotadas
The two HUD captures below carry numbered markers; the same number is the same panel in both modes. Exploration has no total, no category bar, and no options panel (no prices), and its status pill reads "Exploring". The panels that only open on a click are shown after. As duas capturas do HUD abaixo trazem marcadores numerados; o mesmo número é o mesmo painel nos dois modos. O Exploration não tem total, barra de categorias nem painel de opções (sem preços), e a status pill dele diz "Exploring". Os painéis que só abrem no clique vêm depois.
| # | PanelPainel |
|---|---|
| 1 | Brand header.Cabeçalho de marca. |
| 2 | Explore button — toggles the floor-plan minimap, even inside a room. Labelled "Explore" in the expanded rail.Botão Explore — liga/desliga a planta/minimapa, mesmo dentro de um ambiente. Aparece escrito "Explore" no rail expandido. |
| 3 | Zone rail — the rooms. A green dot marks a room whose groups are all chosen; the active room is highlighted. Collapsed it shows icons; hover expands to names; the pin keeps it open.Zone rail — os ambientes. Um ponto verde marca o ambiente com todos os grupos escolhidos; o ativo fica destacado. Recolhido mostra ícones; o hover expande para nomes; o pin mantém aberto. |
| 4 | Status pill — Configuration: room + "x of y selected"; Exploration: "Exploring · product".Status pill — Configuration: ambiente + "x de y selecionados"; Exploration: "Exploring · produto". |
| 5 | Cinema mode — hides the whole interface for a clean view (toggle, or ESC to return).Modo cinema — esconde toda a interface para uma vista limpa (botão, ou ESC para voltar). |
| 6 | Total / budget — the running total; opens the per-zone breakdown. Configuration only.Total / orçamento — o total corrente; abre o detalhamento por zona. Só em Configuration. |
| 7 | Category bar — the groups of the current room. Configuration only.Barra de categorias — os grupos do ambiente atual. Só em Configuration. |
| 8 | Options panel — the item cards with prices; the ⓘ on a card opens the detail panel. Configuration only.Painel de opções — os cards de item com preços; o ⓘ de um card abre o painel de detalhe. Só em Configuration. |
| 9 | Floor-plan minimap — shown when Explore (2) is on.Planta / minimapa — aparece quando o Explore (2) está ligado. |
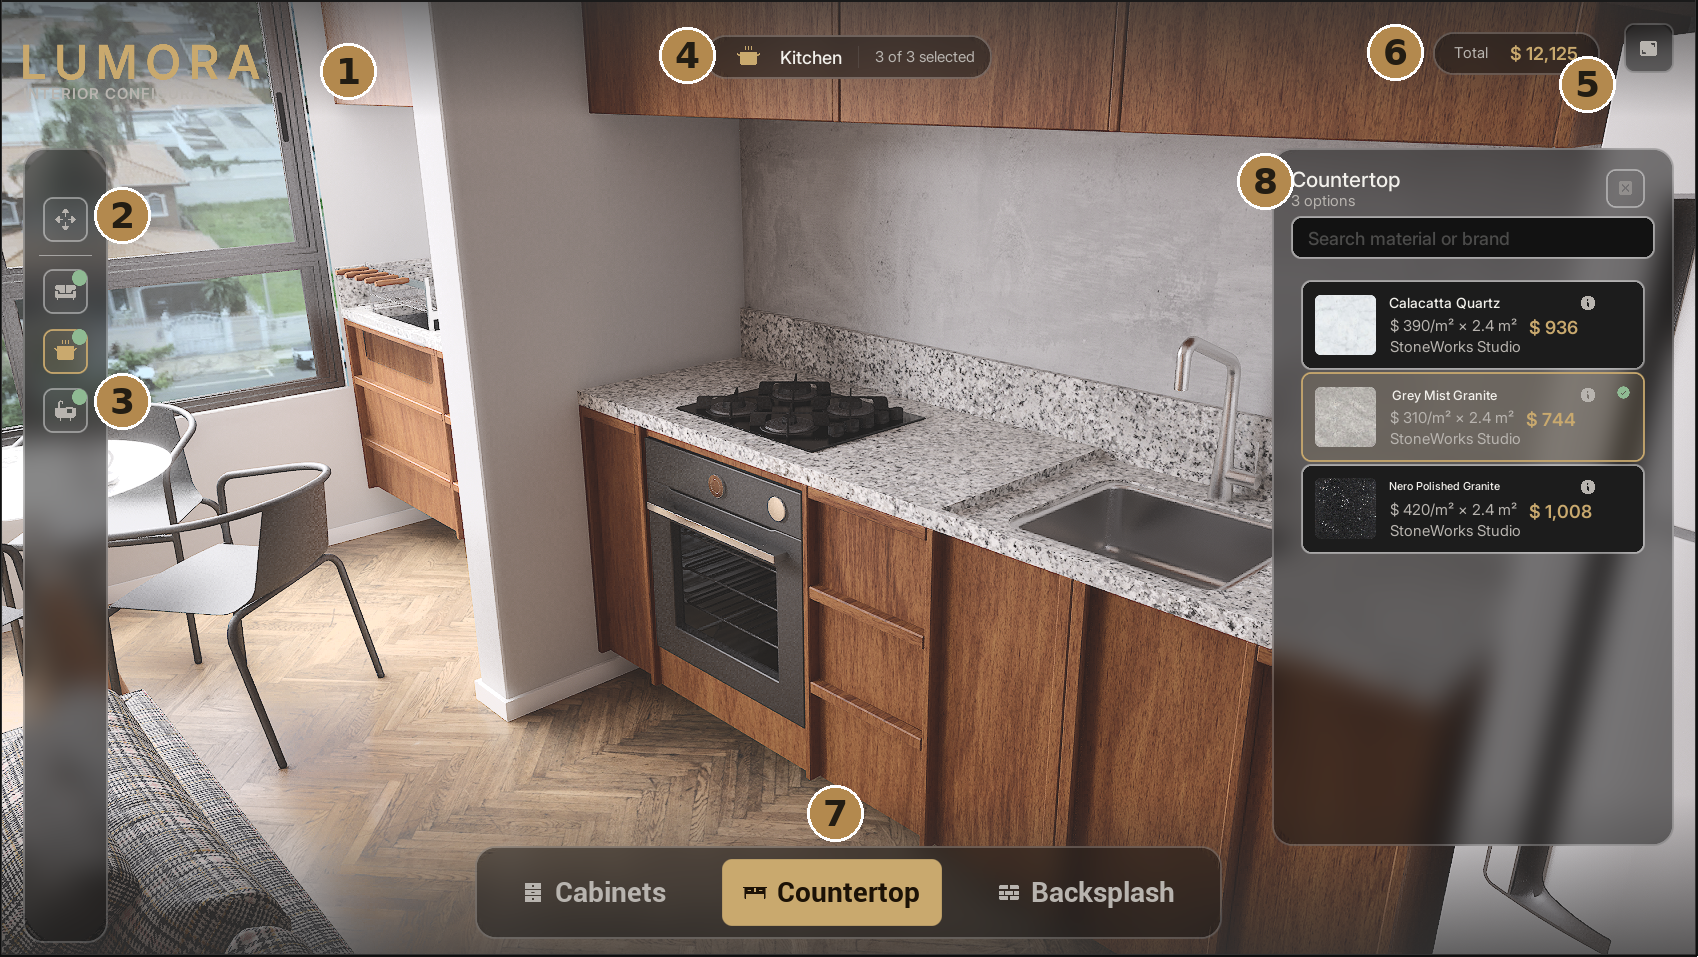
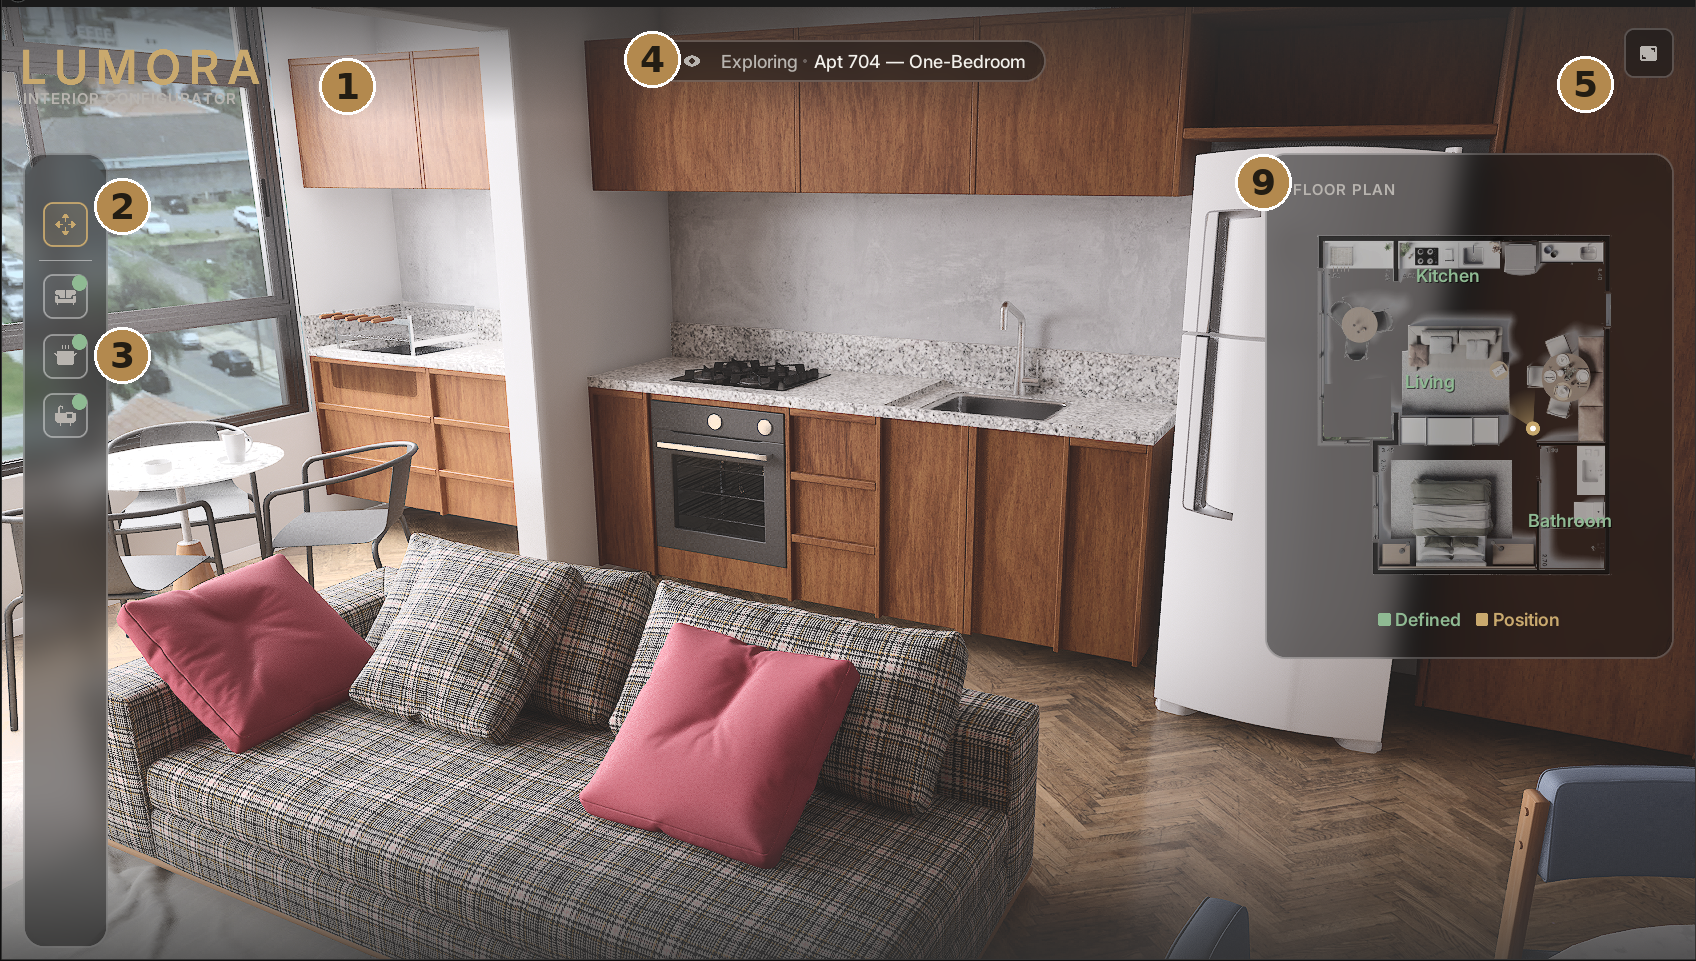
When you apply an item, a short toast appears under the status pill (for example "Light Oak Veneer applied + $2.080"). The detail panel (opened by the ⓘ on a card) shows the item's specs and price and an Apply button — which reads Applied (disabled) on the item that is already active.Ao aplicar um item, um toast curto aparece embaixo da status pill (por exemplo "Light Oak Veneer applied + $2.080"). O painel de detalhe (aberto pelo ⓘ de um card) mostra as specs e o preço do item e um botão Apply — que vira Applied (desabilitado) no item que já está ativo.
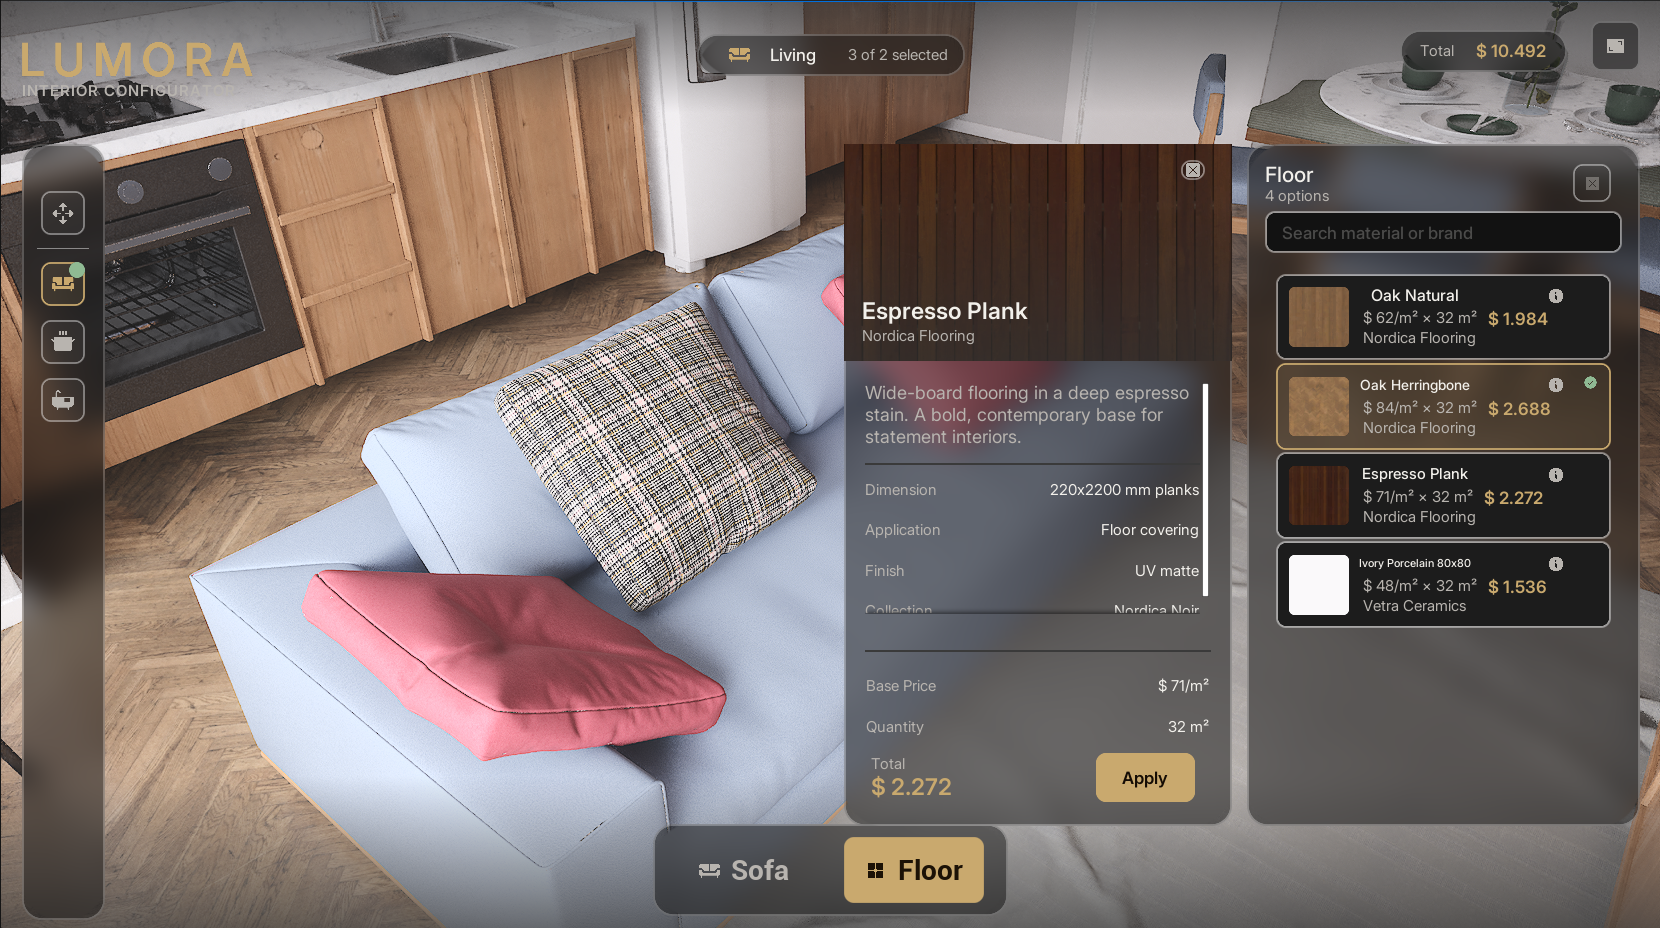
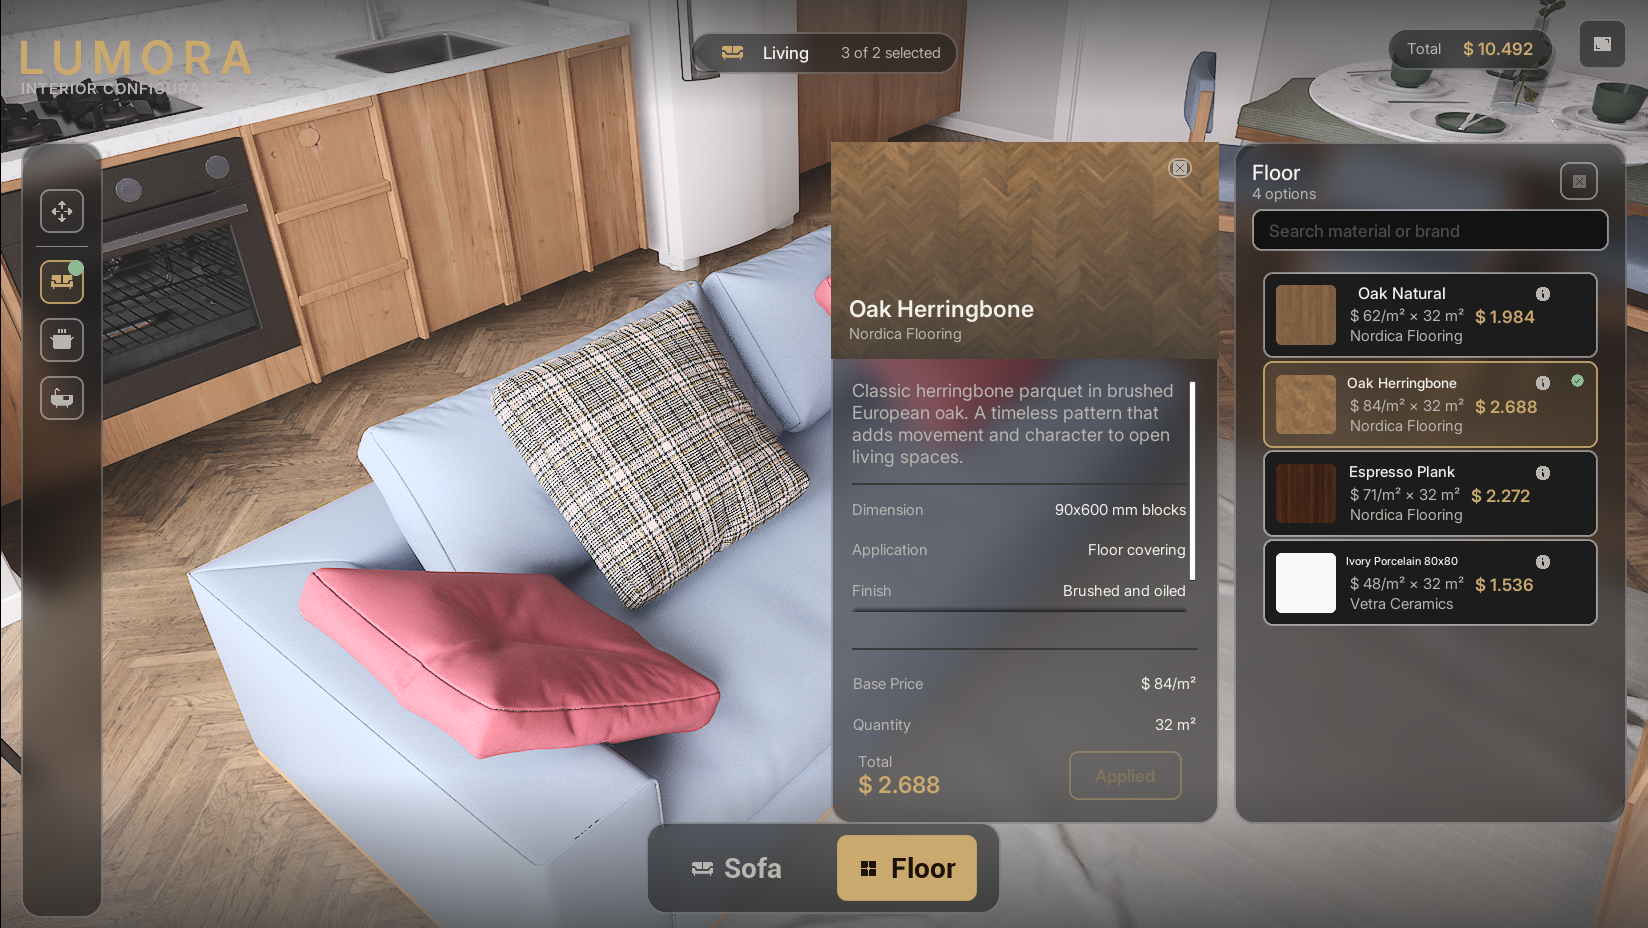
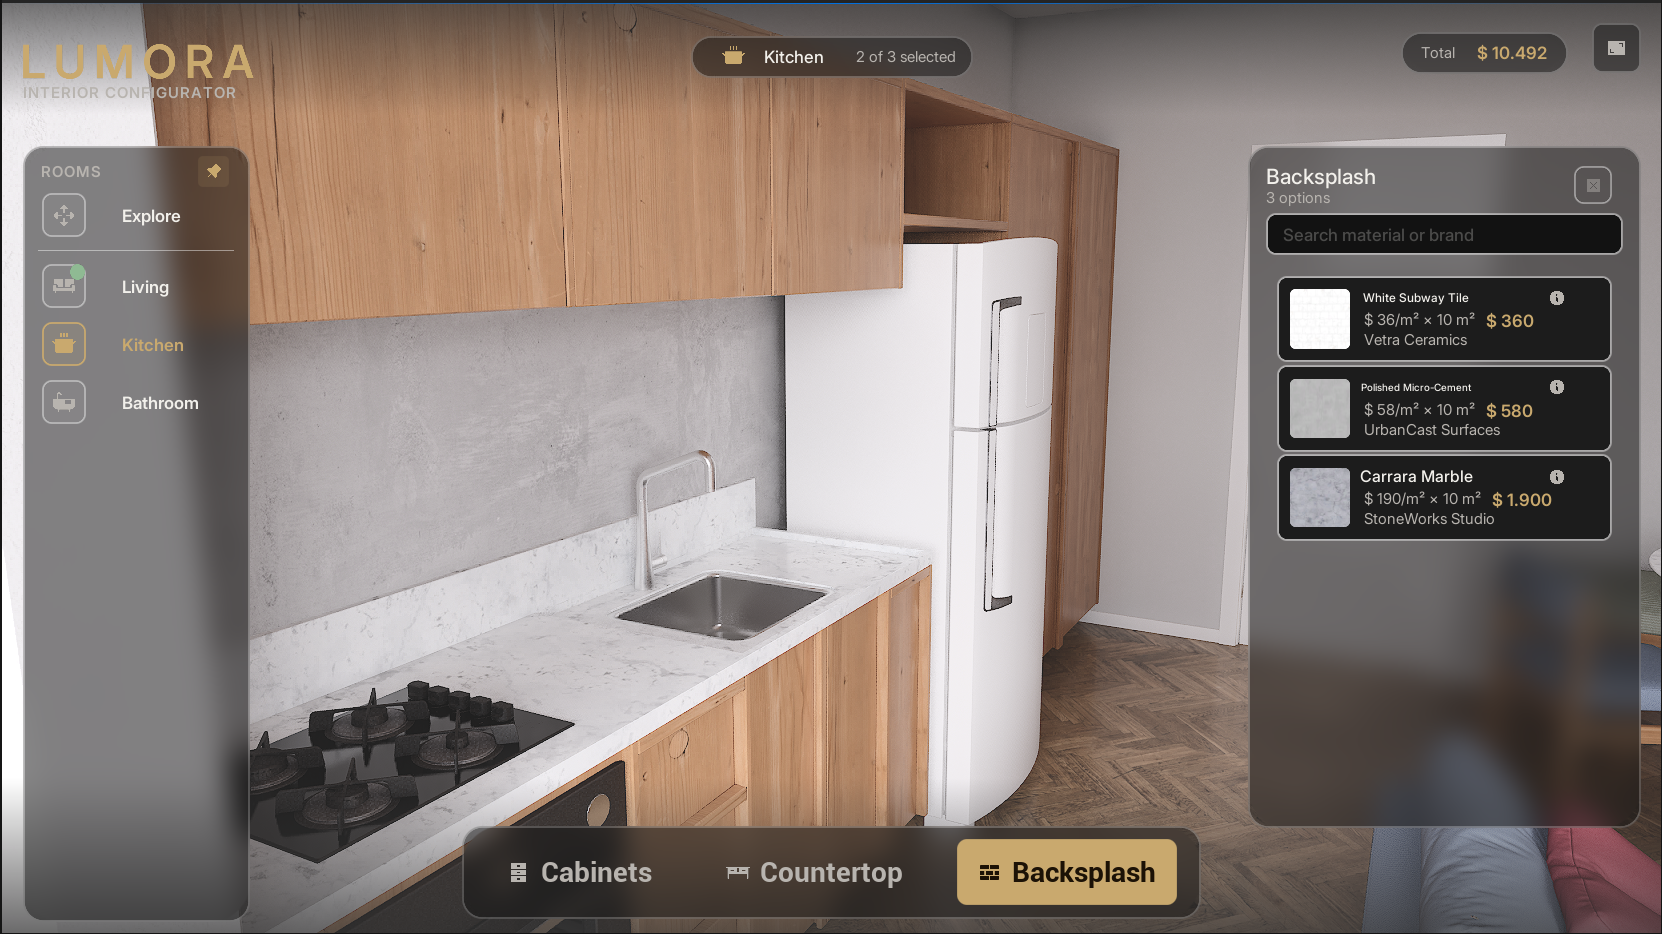
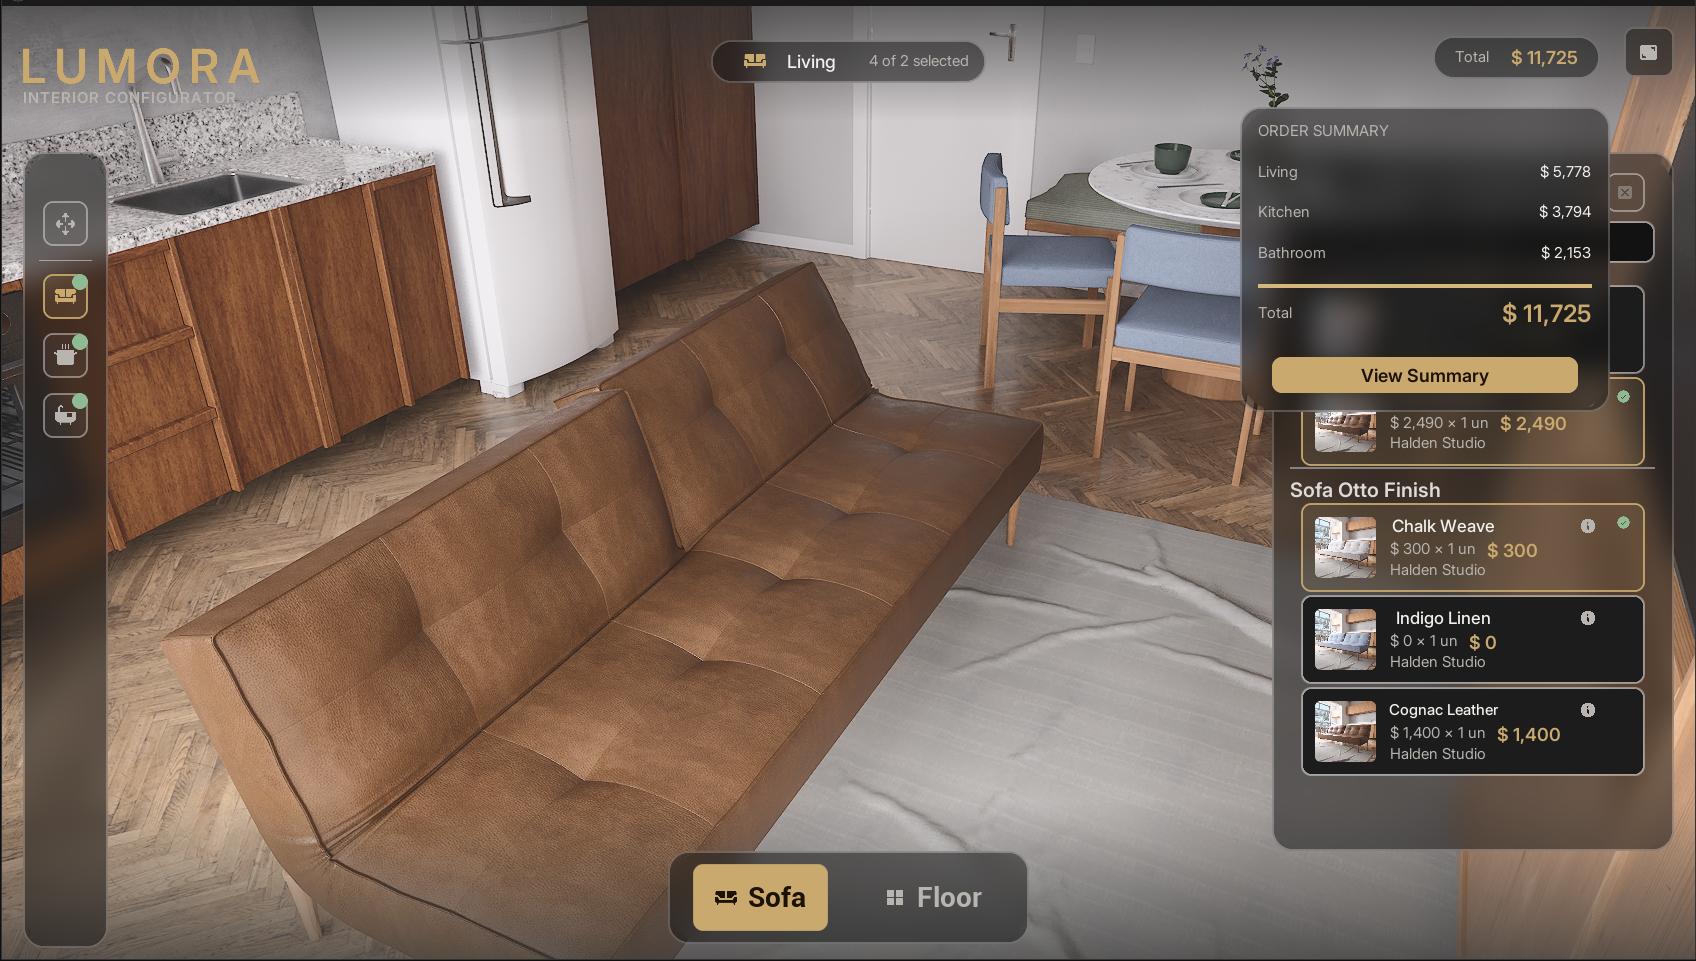
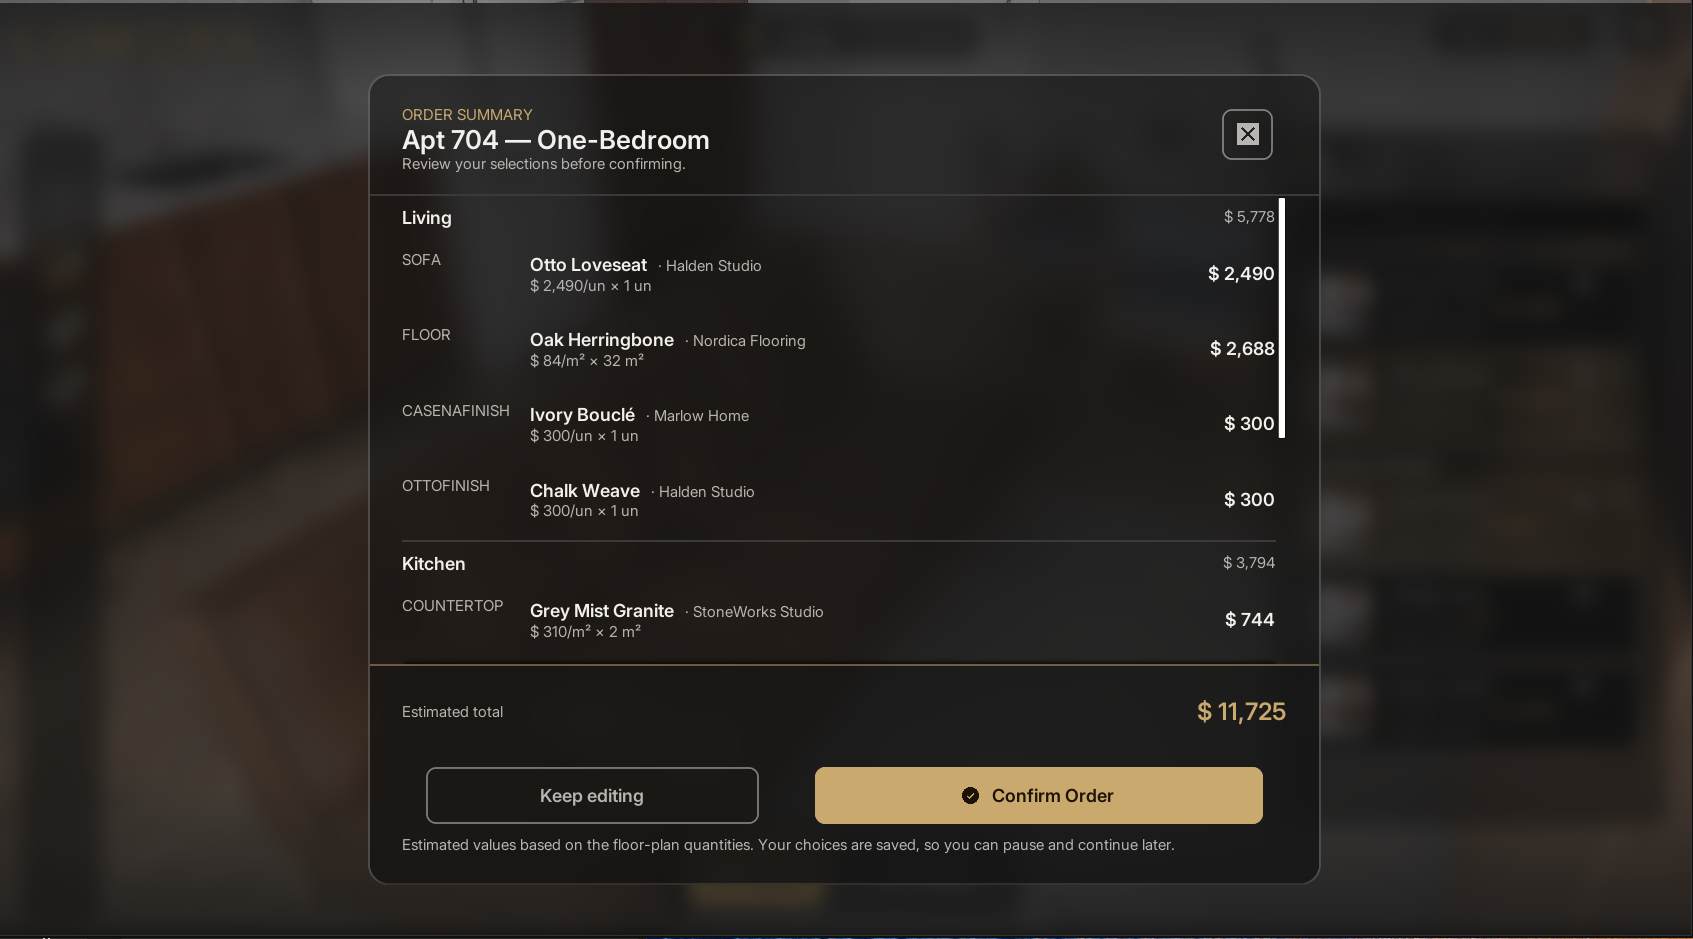
MinimapMinimapa
The minimap is a calibrated static floor plan, not a live top-down camera. This matters when you prepare a new level: you place a calibrator and a floor-plan image, you do not configure a scene capture. O minimapa é uma planta baixa estática calibrada, não uma câmera de topo ao vivo. Isso importa quando você prepara um level novo: você coloca um calibrador e uma imagem de planta, não configura um scene capture.
Setting it up in a levelConfigurando num level
- Place a
BP_MinimapCalibratoractor in the level and set itsFloorPlanTextureto your floor-plan image.Coloque um atorBP_MinimapCalibratorno level e defina oFloorPlanTexturedele com a sua imagem de planta. - In the editor, the plan draws on a plane. Move and scale that plane over the level until it lines up with the real rooms; that calibrates the world rectangle that becomes the map.No editor, a planta é desenhada num plano. Mova e escale esse plano sobre o level até casar com os ambientes reais; isso calibra o retângulo de mundo que vira o mapa.
- At play, the plane hides itself (it is only a calibration guide) and registers with the subsystem, which then knows how to turn a world position into a map coordinate. The floor-plan image becomes the minimap background.No play, o plano se esconde (é só um guia de calibração) e se registra no subsistema, que passa a saber converter uma posição de mundo em coordenada de mapa. A imagem da planta vira o fundo do minimapa.
Without a valid calibrator, the minimap does not show at all. A level with no minimap set up simply has none, which is fine if that product does not need one.Sem um calibrador válido, o minimapa não aparece. Um level sem minimapa configurado simplesmente não tem, o que está ok se aquele produto não precisar de um.
Labels and the player pinRótulos e o marcador do jogador
The minimap widget (WBP_Minimap) projects world positions to pixels on the map. For each zone it finds the registered zone trigger and drops a room label (WBP_MinimapLabel) at the trigger's position; a label turns "done" once that room has at least one choice. A timer moves the player pin to the pawn's position and rotates it to the camera heading, so the marker points where the customer is looking.
O widget do minimapa (WBP_Minimap) projeta posições de mundo em pixels no mapa. Para cada zona ele acha o zone trigger registrado e coloca um rótulo de cômodo (WBP_MinimapLabel) na posição do trigger; um rótulo fica "done" quando aquele cômodo tem ao menos uma escolha. Um timer move o marcador do jogador para a posição do pawn e o gira para a direção da câmera, então o marcador aponta para onde o cliente está olhando.
The player pin's rotation adds a +90° offset to the camera yaw to line the icon up with the viewing direction. If you swap the pin art and it ends up rotated, adjust that offset (90, -90, or 180) in UpdatePlayerPin on WBP_Minimap.
A rotação do marcador do jogador soma um offset de +90° ao yaw da câmera para alinhar o ícone com a direção do olhar. Se você trocar a arte do marcador e ele ficar girado, ajuste esse offset (90, -90 ou 180) em UpdatePlayerPin no WBP_Minimap.
Order data & exportDados do pedido e export
When the customer confirms the order, the configurator builds the full order, saves a local record on disk, and prepares a JSON payload ready for integration. All of this is pure Blueprint — no external plugin is needed to generate and store the data — and it works in the packaged build. Quando o cliente confirma o pedido, o configurador monta o pedido inteiro, grava um registro local em disco e prepara um payload JSON pronto para integração. Tudo isso é Blueprint puro — nenhum plugin externo é necessário para gerar e guardar os dados — e funciona no build empacotado.
What happens on confirmO que acontece ao confirmar
Confirming the order (the ConfirmOrder flow) does, in order: builds the order payload, serializes it to a JSON string, saves a local order record, fires the OnOrderConfirmed event, calls the SendVendorEmail hook, and saves the resume session.
Confirmar o pedido (o fluxo ConfirmOrder) faz, nesta ordem: monta o payload do pedido, serializa em uma string JSON, grava um registro local do pedido, dispara o evento OnOrderConfirmed, chama o hook SendVendorEmail e salva a sessão de retomada.
Where the order is savedOnde o pedido é salvo
The order is written as an Unreal SaveGame to the slot Order_{OrderId} (the OrderId with no spaces or # — e.g. LMR #0802 → Order_LMR0802). The physical file is:
O pedido é gravado como um SaveGame da Unreal no slot Order_{OrderId} (o OrderId sem espaços e sem # — ex.: LMR #0802 → Order_LMR0802). O arquivo físico é:
{GameDir}/Saved/SaveGames/Order_{OrderId}.sav
It is a binary .sav, next to the executable in the packaged build — not a human-readable .json. The record holds the OrderId, client name, client email, project, product, currency, grand total, timestamp, and the full order JSON string. Saving is an upsert per client: one record per client, and a new confirmation overwrites the previous one for the same client (no history is kept).
É um .sav binário, ao lado do executável no build empacotado — não é um .json legível. O registro guarda o OrderId, o nome e o e-mail do cliente, o projeto, o produto, a moeda, o total geral, o timestamp e a string JSON completa do pedido. A gravação é um upsert por cliente: um registro por cliente, e uma nova confirmação sobrescreve a anterior do mesmo cliente (não guarda histórico).
The JSON payloadO payload JSON
The JSON carries the client and project data, the total, and the breakdown per zone. Each zone line has the item's code, name, brand, unit, basePrice, quantity, and subtotal.
O JSON carrega os dados do cliente e do projeto, o total, e o detalhamento por zona. Cada linha de zona tem o code, name, brand, unit, basePrice, quantity e subtotal do item.
{
  "project": "Lumora Residences",
  "orderId": "LMR #0802",
  "client": "João Pereira",
  "email": "joao_pereira@testemail.com",
  "timestamp": "2026-07-29 16:27",
  "currency": "$",
  "total": 5005.0,
  "zones": [
    {
      "zone": "Kitchen",
      "subtotal": 2954.0,
      "lines": [
        { "code": "CtrK_GreyMist", "name": "Grey Mist Granite", "brand": "StoneWorks Studio",
          "unit": "m²", "basePrice": 310.0, "quantity": 2.4, "subtotal": 744.0 }
      ]
    }
  ]
}
Resume sessionSessão de retomada
Separately, the configurator saves a resume session to the slot Config_{OrderId} (per client), so the customer can pick up where they left off. Restoring brings back only the customer's choices and the confirmation state; the identity (name, email, OrderId) always comes from the login, never from the save. That makes it safe when several clients use the same machine (for example a builder inviting clients to configure on-site): each one resumes only their own configuration.
À parte, o configurador salva uma sessão de retomada no slot Config_{OrderId} (por cliente), para o cliente continuar de onde parou. A restauração traz de volta só as escolhas do cliente e o estado de confirmação; a identidade (nome, e-mail, OrderId) vem sempre do login, nunca do save. Isso deixa seguro quando vários clientes usam a mesma máquina (por exemplo, uma construtora convidando clientes a configurar no local): cada um retoma só a própria configuração.
Sending it out (CRM / email hook)Enviando para fora (hook de CRM / e-mail)
By design, the template does not send the order anywhere on its own (so it carries no email or HTTP dependency). It gives you two places to plug in your own integration: Por design, o template não envia o pedido para lugar nenhum sozinho (assim não carrega dependência de e-mail nem de HTTP). Ele te dá dois lugares para plugar a sua integração:
- The
SendVendorEmailhook — a function with a placeholder log. Replace its body with your call (CRM plugin, HTTP request, file write).O hookSendVendorEmail— uma função com um log placeholder. Substitua o corpo pela sua chamada (plugin de CRM, requisição HTTP, escrita de arquivo). - The
OnOrderConfirmeddispatcher — fires at confirmation; bind your own logic to it.O dispatcherOnOrderConfirmed— dispara na confirmação; dê bind na sua própria lógica.
In either one, the data is in LastOrderPayload (the struct) and LastOrderJson (the string). Because the order is upsert per client, your CRM integration should also upsert by OrderId rather than create a new order each time.
Em qualquer um dos dois, os dados estão em LastOrderPayload (a struct) e LastOrderJson (a string). Como o pedido é upsert por cliente, a sua integração de CRM também deve fazer upsert pelo OrderId em vez de criar um pedido novo a cada envio.
Pure Blueprint saves the order to disk as a SaveGame, but cannot, on its own, write a readable .json file to a folder — that needs C++ or a file-IO plugin. The JSON string already exists (in the .sav and at the hook); taking it and writing a readable file, or pushing to a CRM in real time, is a separate plugin tutorial, outside what the template ships.Blueprint puro grava o pedido em disco como SaveGame, mas não consegue, sozinho, escrever um .json legível numa pasta — isso precisa de C++ ou de um plugin de file-IO. A string JSON já existe (no .sav e no hook); pegar ela e escrever um arquivo legível, ou mandar pro CRM em tempo real, é um tutorial de plugin à parte, fora do que o template entrega.
A step-by-step for exporting the data as a real JSON file using a plugin will be added here.Um passo a passo para exportar os dados como um arquivo JSON de verdade usando um plugin será adicionado aqui.
Orphan choices are prunedEscolhas órfãs são podadas
Dependent groups (the finishes) only count while the item that unlocks them is still chosen. If the customer swaps the sofa, the previous sofa's finish loses its meaning, so it is dropped from the selection right away. The progress counter, the total, and the order JSON always read the cleaned selection — an orphan finish never inflates the count or the price. Grupos dependentes (os acabamentos) só contam enquanto o item que os destrava continua escolhido. Se o cliente troca o sofá, o acabamento do sofá anterior perde o sentido, então é removido da seleção na hora. O contador de progresso, o total e o JSON do pedido leem sempre a seleção já limpa — um acabamento órfão nunca infla a contagem nem o preço.
ThemesTemas
The whole runtime interface takes its colors and style from one asset, the theme. Swap the theme, and every screen repaints. A interface de runtime inteira tira as cores e o estilo de um asset, o tema. Troque o tema, e toda tela se repinta.
What a theme isO que é um tema
BPDA_UITheme is a data asset that holds the runtime UI's color and style tokens (around 40 fields). The project points at one through its Theme field, and that theme drives the look across every runtime screen. Currency symbol and languages are project fields, not theme fields, so they do not change when you swap the theme.
O BPDA_UITheme é um data asset que guarda os tokens de cor e estilo da UI de runtime (cerca de 40 campos). O projeto aponta para um pelo campo Theme, e esse tema comanda o visual em toda tela do runtime. Símbolo de moeda e idiomas são campos do projeto, não do tema, então eles não mudam quando você troca o tema.
Almost every runtime widget reads the theme through three hooks: one reapplies everything, one applies the fonts, and one rebuilds the borders and brushes from the colors. Swapping the theme fires these in cascade, so a token change lands across the whole interface at once. Documenting the tokens is, in practice, documenting the product's style kit. Quase todo widget de runtime lê o tema por três ganchos: um reaplica tudo, um aplica as fontes, e um reconstrói as bordas e os brushes a partir das cores. Trocar o tema dispara esses ganchos em cascata, então uma mudança de token vale para a interface inteira de uma vez. Documentar os tokens é, na prática, documentar o kit de estilo do produto.
Create or swap a themeCriar ou trocar um tema
- In the Content Browser, duplicate an existing theme (or the theme template) and rename it.No Content Browser, duplique um tema existente (ou o template de tema) e renomeie.
- Open it and edit the color and style fields to taste.Abra e edite os campos de cor e estilo a gosto.
- Set it on the project's
Themefield. The runtime repaints from it.Aponte ele no campoThemedo projeto. O runtime se repinta a partir dele.
The template already includes a Light and a Dark theme. The pause menu lets the customer switch between them at runtime, and the project's Theme sets which one it opens with. To offer your own look, edit those two (or add more) and keep BrandLogo paired to each so a dark theme carries a light logo.
O template já inclui um tema Light e um Dark. O menu de pausa deixa o cliente alternar entre eles em runtime, e o campo Theme do projeto define com qual ele abre. Para oferecer o seu próprio visual, edite esses dois (ou adicione mais) e mantenha o BrandLogo pareado a cada um, para um tema escuro levar uma logo clara.
The two places a theme appearsOs dois lugares onde o tema aparece
Theme enters the product in two spots, and it is worth telling them apart because they behave differently. O tema entra no produto em dois lugares, e vale separá-los porque eles se comportam de formas diferentes.
- The project's base theme — the
Themefield onBPDA_Project(covered above). It sets the theme the whole interface opens with. Point it at a differentDA_UIThemeand the entire look changes, with no code.O tema base do projeto — o campoThemedoBPDA_Project(visto acima). Define o tema com que a interface inteira abre. Aponte para outroDA_UIThemee o visual todo muda, sem código. - The pause theme switcher —
Seg_ThemeinWBP_Pause, a two-option segmented control (Light / Dark) the customer can flip at runtime. This list is fixed, not an automatic list of every theme:BuildThemeOptionsfills it with two labels, and the control'sOnSelectionChangedbranches by index — index 0 callsSetTheme(DA_UIThemeLight), otherwiseSetTheme(DA_UIThemeDark). The two assets areDA_UIThemeLightandDA_UIThemeDark, inConfigurator/UI/UI_Themes.O seletor de tema na pausa — oSeg_ThemenoWBP_Pause, um controle segmentado de duas opções (Light / Dark) que o cliente troca em runtime. Essa lista é fixa, não é uma lista automática de todos os temas: oBuildThemeOptionsenche com dois rótulos, e oOnSelectionChangeddo controle ramifica por índice — índice 0 chamaSetTheme(DA_UIThemeLight), senãoSetTheme(DA_UIThemeDark). Os dois assets são oDA_UIThemeLighte oDA_UIThemeDark, emConfigurator/UI/UI_Themes.
One difference from the language selector: language has a project-level toggle (bAllowLanguageSwitch, read by Get_Seg_Language_Visibility) that shows or hides it. Theme has no equivalent toggle, so hiding the theme switcher is a widget edit, not a project field.
Uma diferença em relação ao seletor de idioma: o idioma tem uma trava no nível do projeto (bAllowLanguageSwitch, lida pelo Get_Seg_Language_Visibility) que o mostra ou esconde. O tema não tem trava equivalente, então esconder o seletor de tema é uma edição de widget, não um campo de projeto.
Add a third theme to the pause switcherAdicionar um terceiro tema no seletor da pausa
- Create the theme: duplicate
DA_UIThemeLight(or Dark), rename itDA_UITheme<Name>, and adjust its tokens (the colors, fonts, and measures in the token map below).Crie o tema: duplique oDA_UIThemeLight(ou Dark), renomeie paraDA_UITheme<Nome>e ajuste os tokens (as cores, fontes e medidas no mapa de tokens abaixo). - Open
WBP_Pause. InBuildThemeOptions, add a third entry to the optionsMake Array(the new theme's label).Abra oWBP_Pause. NoBuildThemeOptions, adicione uma terceira entrada noMake Arrayde opções (o rótulo do novo tema). - Still in
WBP_Pause, inSeg_Theme'sOnSelectionChanged, replace the branch-by-index with aSwitch on Int: 0 →SetTheme(DA_UIThemeLight), 1 →SetTheme(DA_UIThemeDark), 2 →SetTheme(DA_UITheme<Name>). Each output calls the GameInstance'sSetThemewith the matching data asset.Ainda noWBP_Pause, noOnSelectionChangeddoSeg_Theme, troque o branch por índice por umSwitch on Int: 0 →SetTheme(DA_UIThemeLight), 1 →SetTheme(DA_UIThemeDark), 2 →SetTheme(DA_UITheme<Nome>). Cada saída chama oSetThemeda GameInstance com o data asset correspondente. - Fix the initial highlight: the
DefaultIndexinBuildThemeOptionstoday resolves between 0 and 1 by comparing the current theme. With three themes, generalize it to return the current theme's index (for example aSelectthat matches the current theme against each asset).Ajuste o realce inicial: oDefaultIndexdoBuildThemeOptionshoje resolve entre 0 e 1 comparando o tema atual. Com três temas, generalize para devolver o índice do tema atual (por exemplo, umSelectque casa o tema atual com cada asset).
Ship one theme and hide the switcherEntregar um tema só e esconder o seletor
In WBP_Pause, set Seg_Theme to Collapsed (in the Designer tab, or by setting its visibility when the pause opens). The interface then uses only the theme pointed at by BPDA_Project.Theme, and the customer switches nothing. This is the path when you want to deliver a single locked look.
No WBP_Pause, ponha o Seg_Theme como Collapsed (na aba Designer, ou setando a visibilidade quando a pausa abre). A interface passa a usar só o tema apontado em BPDA_Project.Theme, e o cliente não troca nada. É o caminho quando você quer entregar um visual único e travado.
Two theme improvements are planned: choosing in the setup tool which themes a project offers (a themes list, like languages already have, instead of the fixed Light/Dark pair), and a project toggle to show or hide the pause theme switcher (like the one that already exists for language). Until then, the steps above are the way to do both by hand.Duas melhorias de tema estão planejadas: escolher na ferramenta de setup quais temas o projeto oferece (uma lista de temas, como os idiomas já têm, em vez do par Light/Dark fixo), e uma trava no projeto para mostrar ou esconder o seletor de tema na pausa (como a que já existe para o idioma). Até lá, os passos acima são o jeito de fazer os dois na mão.
Token mapMapa de tokens
The template ships a Light and a Dark theme; the pause menu's theme switch toggles between them. Each field below is a token you can recolour or restyle, and the names come straight from the BPDA_UITheme asset. They fall into six groups: surfaces, accent, text, feedback, fonts, and measures.
O template já vem com um tema Light e um Dark; o seletor de tema no menu de pausa alterna entre eles. Cada campo abaixo é um token que você pode recolorir ou reestilizar, e os nomes vêm direto do asset BPDA_UITheme. Eles se dividem em seis grupos: superfícies, acento, texto, feedback, fontes e medidas.
Colors — background & surfacesCores — fundo e superfícies
| TokenToken | ControlsControla |
|---|---|
ColorBackground | App background color.Cor de fundo do app. |
ColorSurface | Base surface / panel color.Cor base de superfície / painel. |
ColorSurfaceRaised | Raised surface (hovered / elevated elements).Superfície elevada (elementos em hover / elevados). |
ColorSurfaceSubtle | Subtle surface tint (low-emphasis fills).Tinta sutil de superfície (preenchimentos de baixa ênfase). |
ColorSurfaceBorder | Border color for solid surfaces.Cor de borda para superfícies sólidas. |
ColorOutline | Default outline / divider color.Cor padrão de contorno / divisor. |
ColorGlassFill | Glass panel fill (frosted).Preenchimento do painel de vidro (fosco). |
ColorGlassFillLight | Lighter glass fill variant.Variante mais clara do preenchimento de vidro. |
ColorGlassBorder | Glass panel border.Borda do painel de vidro. |
Colors — accent (brand)Cores — acento (marca)
| TokenToken | ControlsControla |
|---|---|
ColorAccent | Primary accent (brand color).Acento primário (cor da marca). |
ColorAccentLight | Lighter accent (hover).Acento mais claro (hover). |
ColorAccentDark | Darker accent (pressed).Acento mais escuro (pressed). |
ColorOnAccent | Text / icon color over the accent.Cor de texto / ícone sobre o acento. |
ColorAccent12 | Accent at 12% opacity (subtle fills).Acento a 12% de opacidade (preenchimentos sutis). |
ColorAccent25 | Accent at 25%.Acento a 25%. |
ColorAccent45 | Accent at 45%. Minimum alpha for borders to anti-alias cleanly (do not go lower on outlines).Acento a 45%. Alpha mínimo para bordas fazerem anti-alias limpo (não usar menos em contornos). |
Colors — textCores — texto
| TokenToken | ControlsControla |
|---|---|
ColorTextPrimary | Primary text color.Cor de texto primária. |
ColorTextSecondary | Secondary / dimmed text color.Cor de texto secundária / apagada. |
ColorTextDisabled | Disabled text color.Cor de texto desabilitado. |
Colors — feedbackCores — feedback
| TokenToken | ControlsControla |
|---|---|
ColorSuccess | Success / confirmation color.Cor de sucesso / confirmação. |
ColorSuccess18 | Success at 18% (subtle success fills).Sucesso a 18% (preenchimentos sutis de sucesso). |
ColorDestructive | Destructive / error color.Cor destrutiva / erro. |
ColorDestructive18 | Destructive at 18%.Destrutivo a 18%. |
FontsFontes
| TokenToken | Used forUsada em |
|---|---|
FontDisplayHero | Hero display font (the largest).Fonte de display hero (a maior). |
FontDisplayXL | Extra-large display.Display extra-grande. |
FontDisplayL | Large display.Display grande. |
FontDisplayM | Medium display.Display média. |
FontDisplay | Display font (large titles).Fonte de display (títulos grandes). |
FontHeading | Heading font.Fonte de título. |
FontBody | Body text font.Fonte de corpo de texto. |
FontLabel | Label font (small UI labels).Fonte de label (rótulos pequenos de UI). |
FontLabelStrong | Emphasized label.Label enfatizada. |
FontCaption | Caption font (the smallest text).Fonte de legenda (o menor texto). |
FontPrice | Font used for prices.Fonte usada nos preços. |
FontEyebrow | Eyebrow font: a small (usually uppercase) label above a title.Fonte "eyebrow": rótulo pequeno (geralmente maiúsculo) acima de um título. |
Measures & brandMedidas e marca
| TokenToken | ControlsControla |
|---|---|
RadiusSM | Small corner radius.Raio de canto pequeno. |
RadiusMD | Medium radius (buttons, cards).Raio médio (botões, cards). |
RadiusLG | Large radius (panels, pills).Raio grande (painéis, pills). |
Width | Border / outline thickness of the themed brushes.Espessura de borda / contorno dos brushes temáticos. |
BrandLogo | Logo paired to the theme (dark theme → light logo, and vice versa).Logo pareada ao tema (tema escuro → logo clara, e vice-versa). |
Field referenceReferência de campos
Every field of the data assets and the item table, for when you need the exact meaning of one.Todo campo dos data assets e da tabela de itens, para quando você precisar do sentido exato de um.
Project fieldsCampos de Project
| FieldCampo | What it doesO que faz |
|---|---|
DisplayName | Project name; shows on the splash, login, and welcome.Nome do projeto; aparece no splash, login e welcome. |
Company | Company name (branding; fallback for the brand label).Nome da empresa (branding; fallback do brand label). |
Logo | Logo in the header. If empty, the header falls back to the Company text.Logo no cabeçalho. Se vazio, o cabeçalho cai para o texto de Company. |
HeroImage | Background image for the splash and login.Imagem de fundo do splash e do login. |
Mode | Mode the project opens in (Exploration or Configuration).Modo em que o projeto abre (Exploration ou Configuration). |
VendorMail | Vendor/agent email an order notice would go to (demo).E-mail do vendedor/agente para onde iria um aviso de pedido (demo). |
Products | The products the project offers.Os produtos que o projeto oferece. |
Theme | UI theme applied across the whole project.Tema de UI aplicado no projeto todo. |
CurrencySymbol | Currency symbol prefixed to every price (for example $, R$, EUR). Project-level; it does not change with the UI language.Símbolo de moeda prefixado em todo preço (por exemplo $, R$, EUR). É do projeto; não muda com o idioma da UI. |
Languages | Languages the project offers.Idiomas que o projeto oferece. |
DefaultLanguageIndex | Index in Languages the configurator opens with.Índice em Languages com que o configurador abre. |
bAllowLanguageSwitch | Whether the language selector appears in the pause settings.Se o seletor de idioma aparece nas settings da pausa. |
Product fieldsCampos de Product
| FieldCampo | What it doesO que faz |
|---|---|
DisplayName | Product name (splash/start, product card).Nome do produto (splash/start, card do produto). |
Description | Short description on the start / product card.Descrição curta no start / card do produto. |
Thumbnail | Preview image on the start menu card.Imagem de preview no card do menu inicial. |
LevelPath | The level to open for this product (used by Open Level).O level a abrir para esse produto (usado pelo Open Level). |
CameraType | Default camera (FPS walkthrough or Orbital).Câmera padrão (FPS walkthrough ou Orbital). |
Zones | The rooms available in the product.Os ambientes disponíveis no produto. |
ItemsTable | DataTable with every selectable item.DataTable com todos os itens selecionáveis. |
BadgeText | Optional badge on the product (for example 'New').Selo opcional no produto (por exemplo 'New'). |
Zone fieldsCampos de Zone
| FieldCampo | What it doesO que faz |
|---|---|
DisplayName | Room name, shown on the rail, minimap, and HUD.Nome do ambiente, no rail, minimapa e HUD. |
Icon | Room icon for the rail / minimap.Ícone do ambiente para o rail / minimapa. |
DetectionType | How the room activates (Trigger overlap or Manual).Como o ambiente ativa (Trigger overlap ou Manual). |
RootGroups | Groups always shown for this room.Grupos sempre exibidos para esse ambiente. |
DependentGroups | Groups shown conditionally, keyed by the item that unlocks them.Grupos exibidos condicionalmente, chaveados pelo item que os destrava. |
ZoneId | Stable room ID (PascalCase, no dots); the single source of the zone identifier.ID estável do ambiente (PascalCase, sem pontos); a fonte única do identificador da zona. |
Group fieldsCampos de Group
| FieldCampo | What it doesO que faz |
|---|---|
GroupId | Group identifier. The key used in the trigger's multiplier map.Identificador do grupo. A chave usada no mapa de multiplicadores do trigger. |
DisplayName | Displayed group name.Nome exibido do grupo. |
Icon | Group icon.Ícone do grupo. |
ItemRows | The item codes (row names) that make up the group.Os códigos de item (row names) que compõem o grupo. |
DependsOn | For dependent groups, the item code that unlocks the group. Empty on root groups.Para grupos dependentes, o código do item que destrava o grupo. Vazio nos root groups. |
Items table columnsColunas da tabela de itens
| ColumnColuna | What it holdsO que guarda |
|---|---|
| Row NameRow Name | Unique item code. Groups and validation reference the item by this.Código único do item. Os grupos e a validação referenciam o item por ele. |
DisplayName | Displayed item name.Nome exibido do item. |
Brand | Brand.Marca. |
Description | Item description (shown on the detail panel).Descrição do item (mostrada no painel de detalhe). |
Price | Gross price (raw number; the UI formats it with the currency symbol).Preço bruto (número cru; a UI formata com o símbolo de moeda). |
MeasureType | Unit of measure, an enum (for example SquareMeter). Drives the per-unit suffix shown next to the price.Unidade de medida, um enum (por exemplo SquareMeter). Define o sufixo por unidade mostrado ao lado do preço. |
Thumbnail | Path to the item's thumbnail texture.Caminho da textura de thumbnail do item. |
VariantSetName / VariantName | Pair that links the item to a visual variant (optional; an item with no variant drives no swap).Par que liga o item a uma variante visual (opcional; item sem variante não dirige troca). |
CustomData | A map of key → value pairs. Each pair becomes a spec line on the detail panel (for example Finish → Matte). See Custom specs.Um mapa de pares chave → valor. Cada par vira uma linha de spec no painel de detalhe (por exemplo Acabamento → Matte). Veja Specs customizadas. |
Group | The GroupId the item belongs to. Editable via the grid's Group dropdown.O GroupId a que o item pertence. Editável pela dropdown Group do grid. |
Zone Trigger fieldsCampos do Zone Trigger
| FieldCampo | What it doesO que faz |
|---|---|
ZoneRef | The zone Data Asset this trigger represents. Set per instance in the level.O Data Asset da zona que esse trigger representa. Setado por instância no level. |
Multipliers | Area / quantity multiplier per group in this room (map GroupId → float). Read for pricing.Multiplicador de área / quantidade por grupo neste ambiente (mapa GroupId → float). Lido para o preço. |
Hidden templatesTemplates ocultos
The New buttons clone hidden template assets: DA_Project_Template, DA_Product_Template, DA_Zone_Template, and DT_Items_Template. They are hidden from the lists (anything ending in "_Template" is filtered out) and must not be deleted, or the New buttons stop working.
Os botões New clonam assets de template ocultos: DA_Project_Template, DA_Product_Template, DA_Zone_Template e DT_Items_Template. Eles ficam ocultos das listas (tudo que termina em "_Template" é filtrado) e não podem ser apagados, ou os botões New param de funcionar.
Adding a languageAdicionar um idioma
Adding a language takes two steps: create the entry in the project's Languages, and compile its culture in the Localization Dashboard (Window → Localization Dashboard). The dashboard step is outside the setup tool; without it, the entry exists but the translated text will not load.
Adicionar um idioma tem dois passos: criar a entrada em Languages do projeto, e compilar a cultura dele no Localization Dashboard (Window → Localization Dashboard). O passo do dashboard é fora da ferramenta de setup; sem ele, a entrada existe mas o texto traduzido não carrega.
Localization applies to the template's built-in UI strings. Your own catalog data (item names, descriptions, CustomData) is not translated automatically — enter those translations yourself if you need them per language.A localização se aplica aos textos fixos da UI do template. Os seus dados de catálogo (nomes de item, descrições, CustomData) não são traduzidos automaticamente — coloque essas traduções você mesmo se precisar delas por idioma.
Troubleshooting & FAQProblemas e FAQ
I edited something and it vanishedEditei algo e sumiu
Catalog edits and multiplier values live in memory until you press Save in the sidebar. Creating a project, product, zone, or group and assigning items to groups save on their own; everything else waits for Save. See the Save rule.Edições do catálogo e valores de multiplicador ficam em memória até você apertar Save na barra lateral. Criar projeto, produto, zona ou grupo e atribuir itens a grupos salvam sozinhos; todo o resto espera o Save. Veja a regra do Save.
Items show up free in the runtimeOs itens aparecem de graça no runtime
A group priced its items at zero because it has no multiplier, or its zone has no trigger in the scene. Run Validation: it flags root groups with no multiplier and zones with no trigger. Add the trigger and set the multiplier, then Save.Um grupo precificou os itens a zero porque não tem multiplicador, ou a zona dele não tem trigger na cena. Rode a Validation: ela sinaliza root groups sem multiplicador e zonas sem trigger. Adicione o trigger e defina o multiplicador, depois Save.
I reimported a CSV but the grid looks the sameReimportei um CSV mas o grid está igual
Press Reload on the Catalog page to rebuild the grid from the table. The grid is a working copy, so it does not refresh by itself after an external import.Aperte Reload na página Catalog para reconstruir o grid a partir da tabela. O grid é uma cópia de trabalho, então ele não atualiza sozinho depois de um import externo.
My project is not on the Home listMeu projeto não está na lista da Home
Home only scans a fixed projects folder. Keep your project assets there, or press Sync to re-scan after moving them.A Home só escaneia uma pasta fixa de projetos. Mantenha os seus assets de projeto ali, ou aperte Sync para re-escanear depois de movê-los.
A group is missing from the Catalog's Group dropdownUm grupo não aparece na dropdown Group do Catalog
The Group dropdown lists the root groups of every zone in the product. If a group is missing, create it on the Zones page first. Then use Sync groups if you want existing rows reconciled.A dropdown Group lista os root groups de todas as zonas do produto. Se um grupo falta, crie-o antes na página Zones. Depois use Sync groups se quiser reconciliar as linhas existentes.
I changed the tool itself and nothing updatedMudei a própria ferramenta e nada atualizou
If you extend the Editor Utility Widget (its widgets or graph), close and reopen its tab to see the result. This only matters if you are customizing the tool, not for normal use.Se você estende o Editor Utility Widget (os widgets ou o grafo dele), feche e reabra a aba para ver o resultado. Isso só importa se você está customizando a ferramenta, não no uso normal.
Sales Configurator — Unreal Engine 5 template. This documentation is bilingual; use the English / Português switch in the sidebar. Every heading has a copyable link (hover the title, click the #). Sales Configurator — template de Unreal Engine 5. Esta documentação é bilíngue; use o botão English / Português na barra lateral. Todo título tem um link copiável (passe o mouse no título e clique no #).